

Modern Dining Room Reveal
It’s done! It’s done! The dining room makeover is done!
If you’ve been following along, you saw last’s week post where I shared the accent wall we installed in our dining room. Well, as I was writing that post, I was working on putting the dining room back together for the grand reveal. It took a TON of restraint to not share a million sneak peeks, but I kept my trap shut and now I’m so excited that I can share it with the world!
Dining Room Makeover - Before and After
It’s done! It’s done! The dining room makeover is done!
If you’ve been following along, you saw last’s week post where I shared the accent wall we installed in our dining room.
Well, as I was writing that post, I was working on putting the dining room back together for the grand reveal. It took a TON of restraint to not share a million sneak peeks, but I kept my trap shut and now I’m so excited that I can share it with the world!

If you recall, our dining room looked quite a bit different when we bought our house last year.

Here’s a shot from the other doorway.

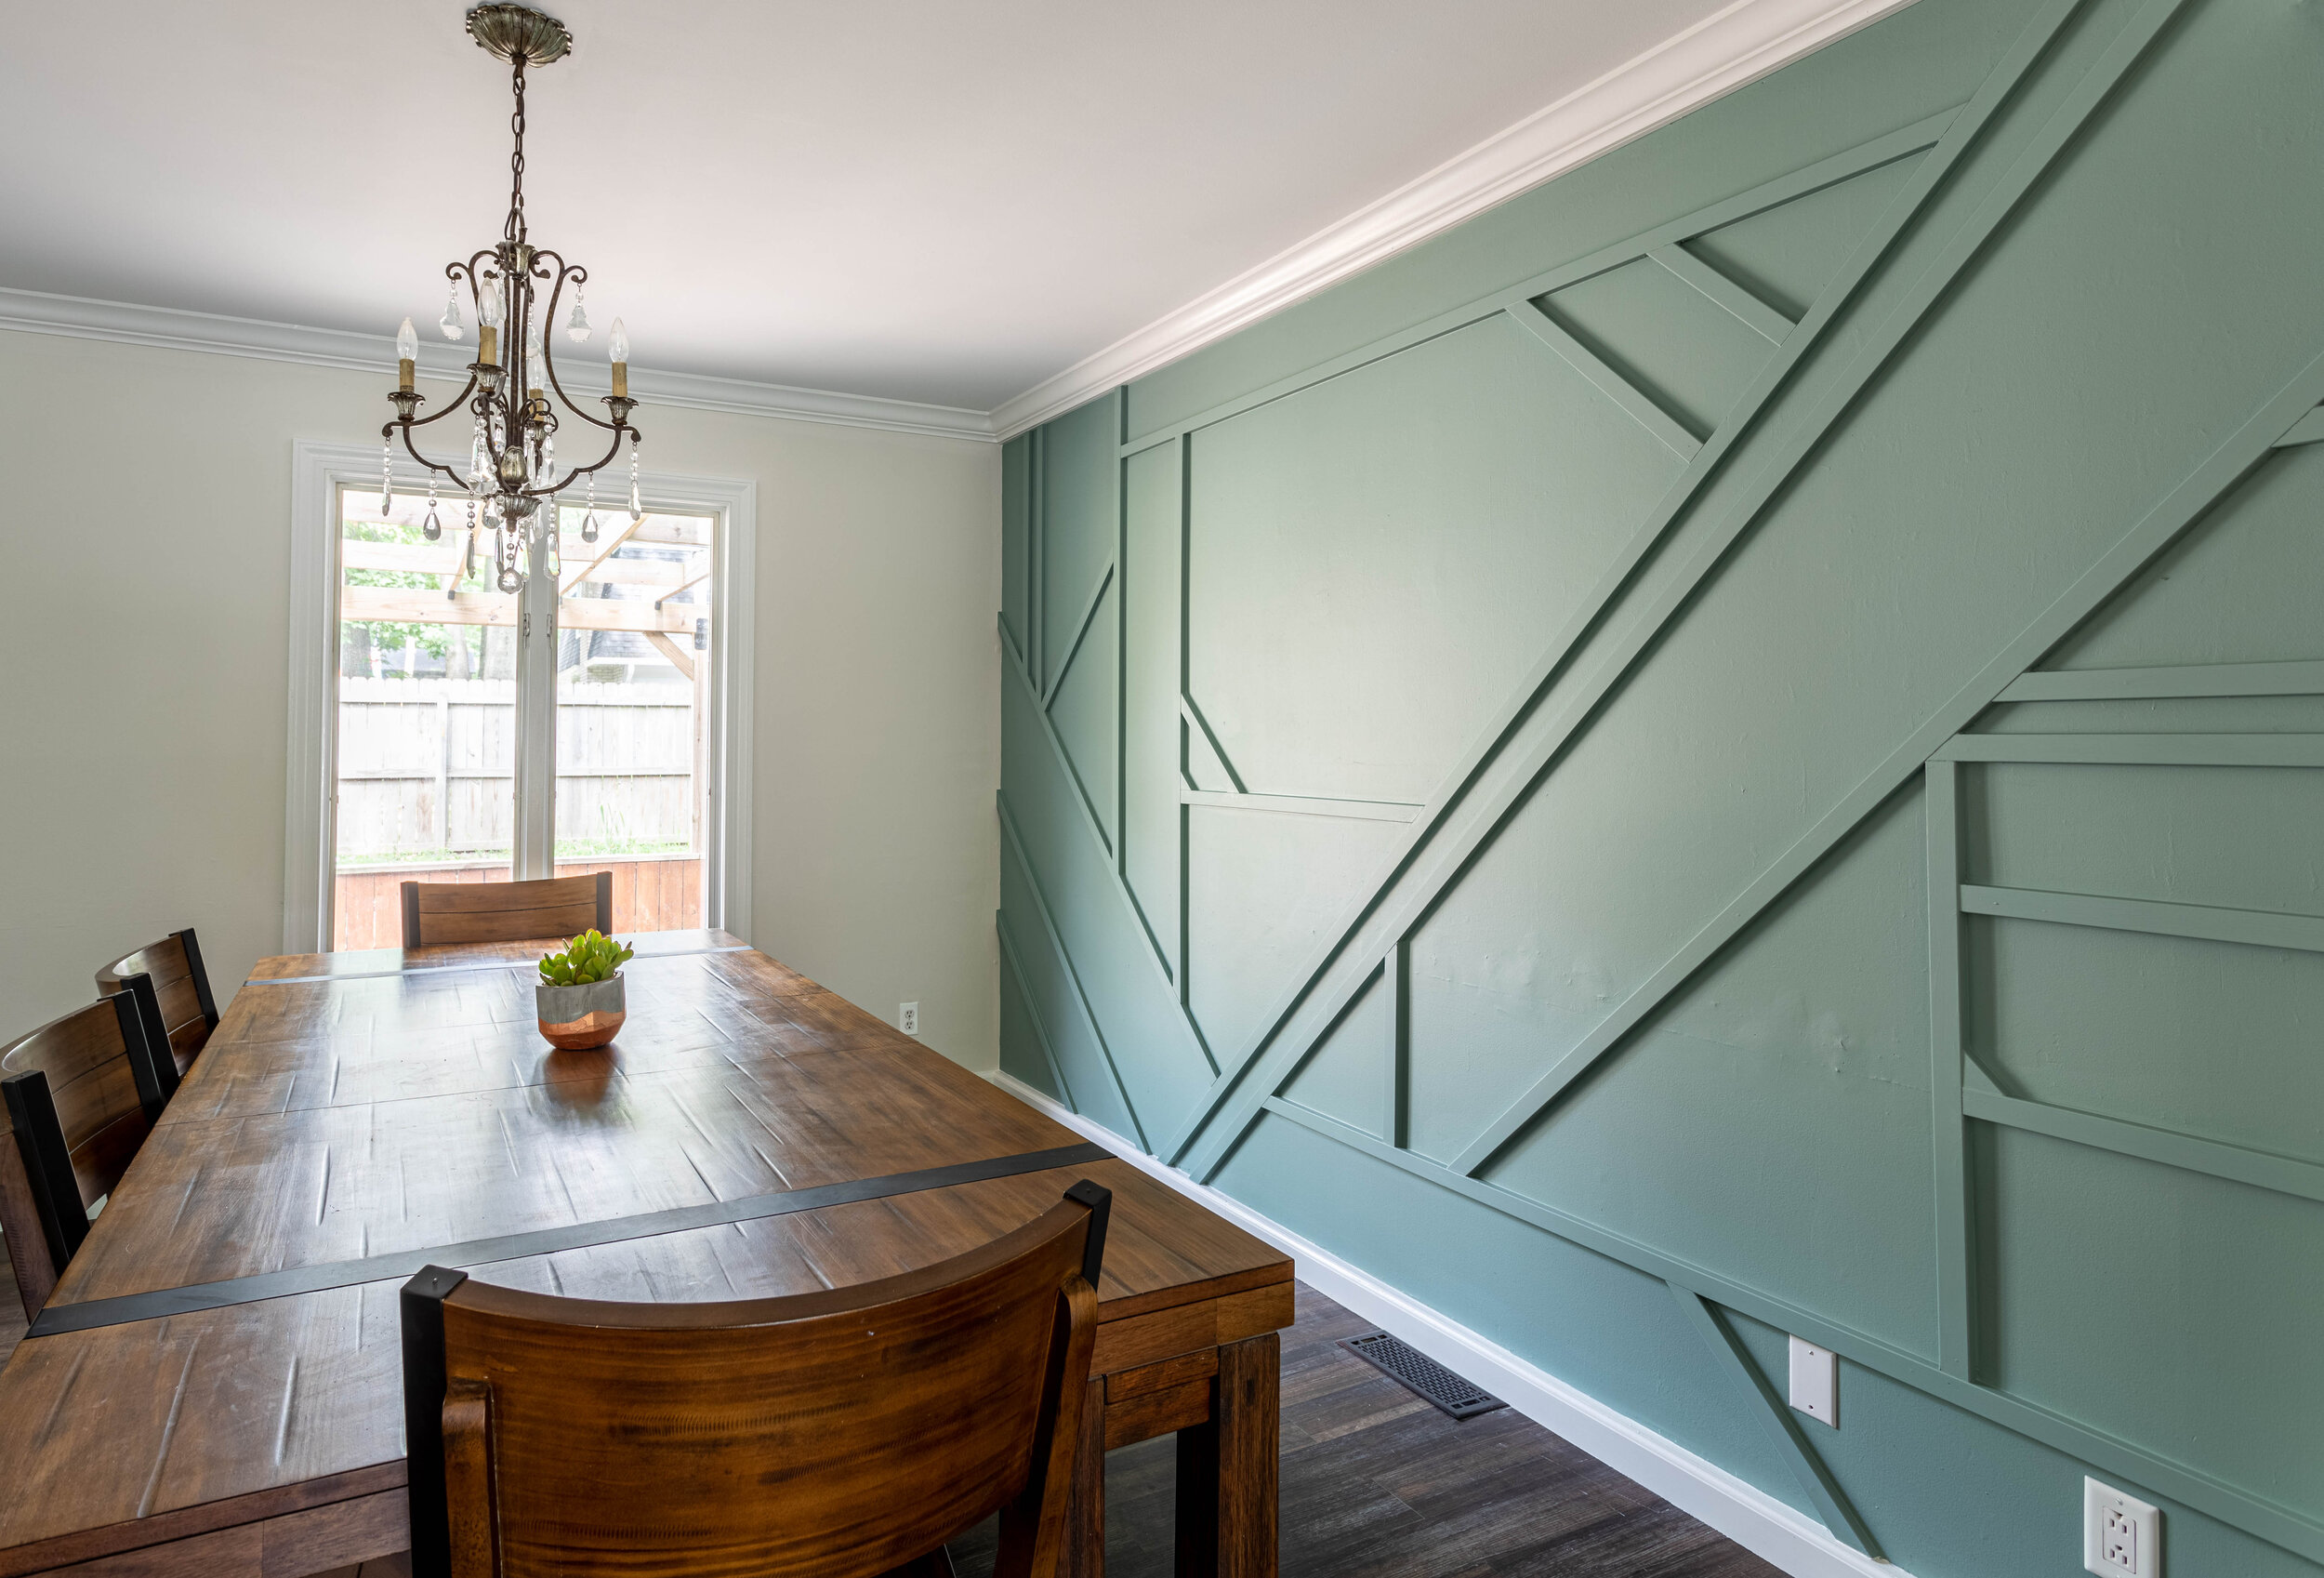
And here’s how it looks today.

When we moved in, the dining room was definitely not our style. In fact, it didn’t even seem like it was a part of the rest of the house! It had a mind of its own, with its bright yellow faux finish walls and deep red and gold border. Not to mention the ornate chandelier you see in the pictures above.
The doorway leading to the kitchen definitely wasn’t doing this room any favors either. It was the size of an average doorway but made the dining room feel needlessly closed off from the kitchen, so we took matters into our own hands.
We removed just about everything from this room and started from scratch - including stripping wallpaper, replacing the trim and crown molding, and widening that doorway (on a whim!) so it now spans 8 feet!


Then, after much deliberation, I finally chose a paint color and we installed our accent wall.
But of course, those steps were just the big pieces of the makeover. The icing on the cake and what makes a room really come together is the decor!
I made a whole bunch of mood boards during this overhaul to help get an idea of the direction I wanted to go with the decor (and because I just couldn’t help myself and wanted to see ALL the options). We ended up going with this design:

As a side note, I’m really just getting my feet wet with making mood boards, and I’M OBSESSED. They’re a fantastic and no-risk way to visualize a space in a ton of different ways. Why has it taken me so long to start making these!?
Plus, seeing the out of proportion design above compared to the real-life example below cracks me up. 10/10 would do again.

As an Amazon Associate, I earn from qualifying purchases. This post may contain affiliate links, meaning I receive commissions for purchases made through those links, at no cost to you.
Now… back to the decor! Let’s take a little tour, shall we?
Obviously, our dining room table made it back into the room… that was a no-brainer since it’s pretty new. But honestly, the table and the curtains are the only things that didn’t change!
One of the biggest changes was adding our new area rug. Since the table and chairs are a darkish color and the flooring is super dark, the rug really helped brighten things up. Plus, it added some more interest to the room with the blues, greens, and orange going on in the design.

Another big change is the new light fixture. We switched out the fancy pants chandelier with something more modern and in line with the style we were going for. It took about 3 tries to get the right light bulbs, but now that it’s completely installed I’m in love!

I mentioned at the start of this makeover that I planned on switching out the old buffet table with my IKEA Malm dresser… and I’m happy to report that I followed through and am pleased with how it’s working in the space. The only downside is that now all my clothes are hanging out on the floor of my office until we build my new closet in the master bedroom, ha!

Other changes you’ll notice in our new and improved dining room is artwork! Two of the pictures are simply pages from newspapers we found in the attic of our last house.
This one is from when the first Star Wars was in theaters.

And I’m fascinated by this one because of how cheap paint was!

Plus, it has this little section that makes me laugh.

We also threw some watercolors I painted in here. The colors tie in nicely with the accent wall and the direction I’m going with the rest of the house. I painted these before I got brave and started buying real plants. Perhaps I was living vicariously through my paintings, hoping that they could replace having real plants before I was brave enough to start buying real plants? (Answer: they couldn’t)


Anywho - that’s the dining room!
A complete 180 from where this room started and I am so happy for that fact.

There are still a few finishing touches I want to add because really, is a room EVER completely done? (No, it’s not.) But the finishing touches are minor - like adding leather pulls to the dresser, maybe switching out the white picture frames for something gold or brass, changing the pot of the hanging plant, and possibly adding another largish plant in one of the empty corners.
In the meantime, I’m thrilled with how this room turned out. Unfortunately, a lot of the rest of the house is still a hot mess at the moment. I shared on Instagram not too long ago that I removed all the cabinet doors in the kitchen so I can start painting those, obviously we’re deep in our master suite reno and therefore have been displaced to the loft, and half of my office still needs furniture, along with so many other incomplete spaces in the house.
That being said, we’re taking solace in the fact that even though the dining room is upstaging the rest of the house, at least we don’t have anything pressing left to do in there to make it functional and beautiful. Now we can pivot back to some of our other unfinished spaces - stay tuned!

Related Dining Room Renovation Posts
Modern Dining Room Makeover

DIY Geometric Wood Accent Wall
Well, we finally did it. Our geometric wood accent wall is complete and I’M SO IN LOVE WITH IT! In fact, I love the finished product so much, I wrote a tutorial about it! (Surprise, surprise).
How to Create a Modern Wood Feature Wall
Well, we finally did it. Our geometric wood accent wall is complete and I’M SO IN LOVE WITH IT!
Waaaayyyy back in March, I started renovating our dining room. I was completely inspired by the accent wall Liz over at Within the Grove created and just knew I had to give it a whirl. And heck - I had nothing to lose considering what we started with!

But because we seriously lack focus as far as home renovations go, we got distracted working on my home office redesign, finishing the flip, and… what else?
Oh yeah, completely demolishing our master suite.
But FINALLY, we were able to take a little bit of time, find some childcare (toddlers and nail guns don’t mix - who knew!?), and put this wall up in just a couple of hours! Easy peasy. Then I just had to caulk and paint and now I spend most of my time gazing lovingly at it. I mean, wouldn’t you!?

In fact, I love the finished product so much, I wrote a tutorial about it! (Surprise, surprise). Here’s how I created my geometric wood accent wall:
Materials
As an Amazon Associate, I earn from qualifying purchases. This post may contain affiliate links, meaning I receive commissions for purchases made through those links, at no cost to you.
- Primed 1 x 2 MDF boards (the amount you need will vary based on your design)
- Brad nail gun
- Nails
- Paint
- Paintbrush
- Craft brush
- Paintable caulk
- Wood Putty
- Sandpaper
- Miter saw
- Level
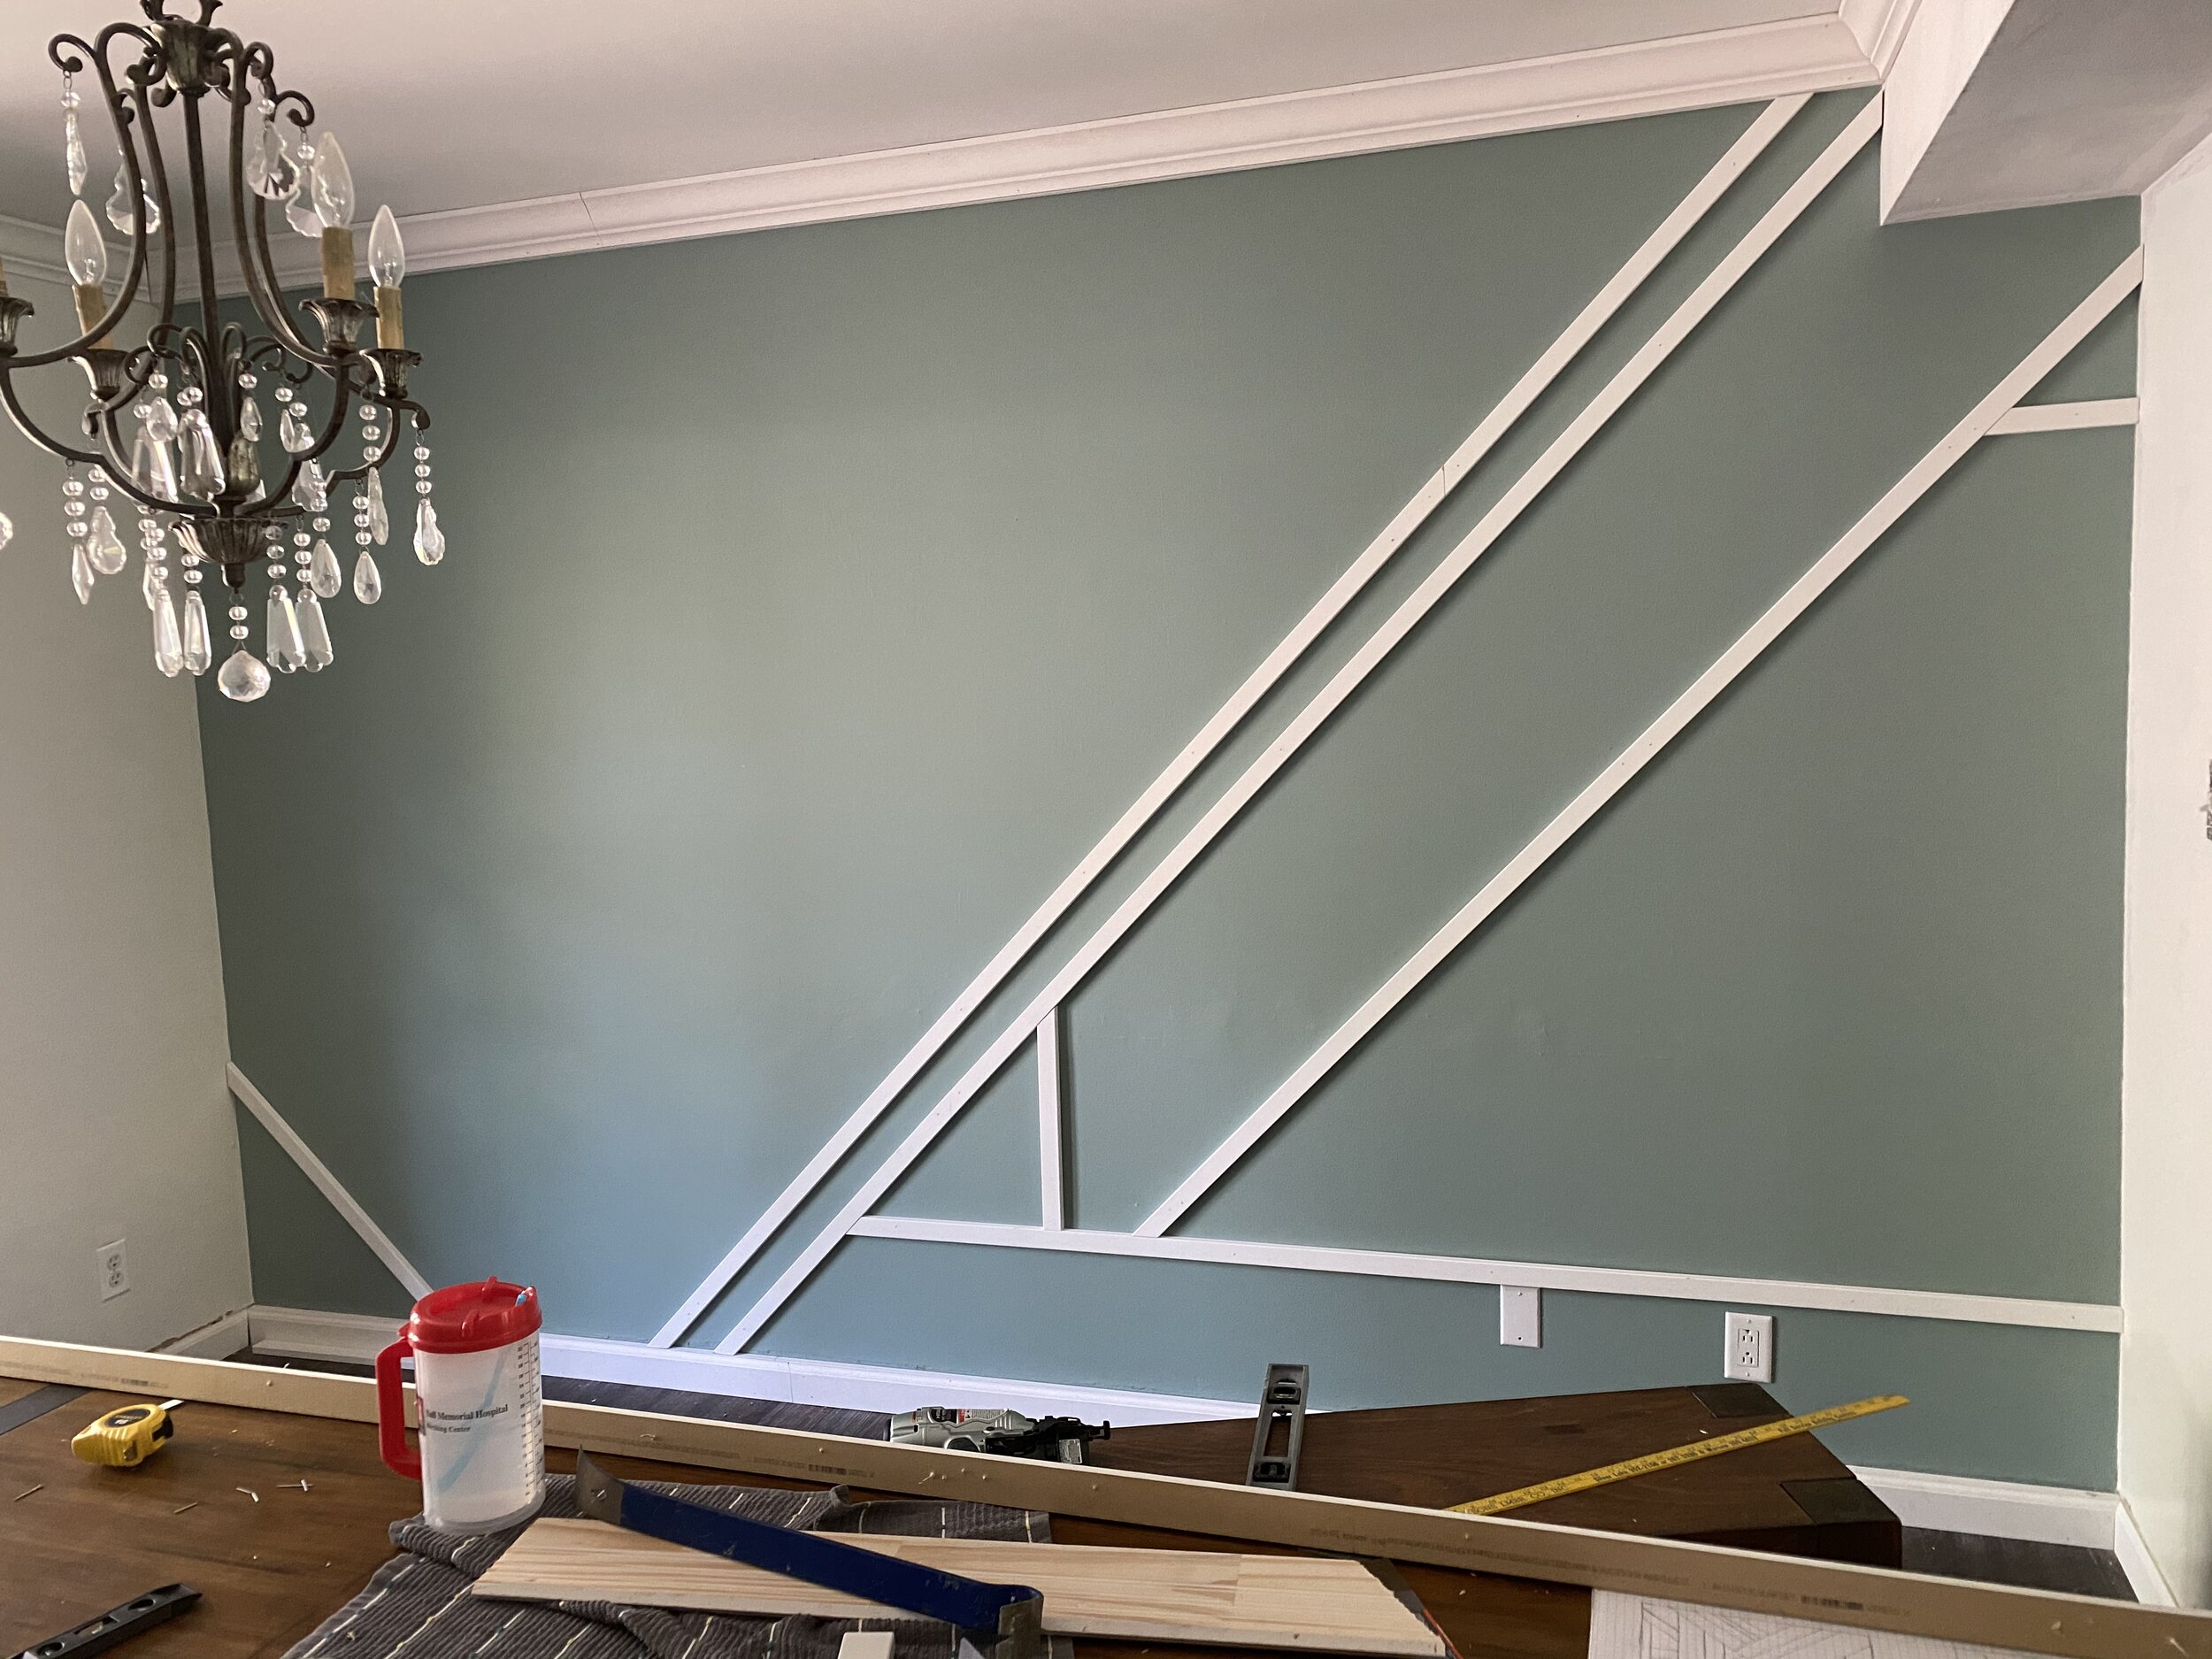
Draft the Design of your Accent Wall
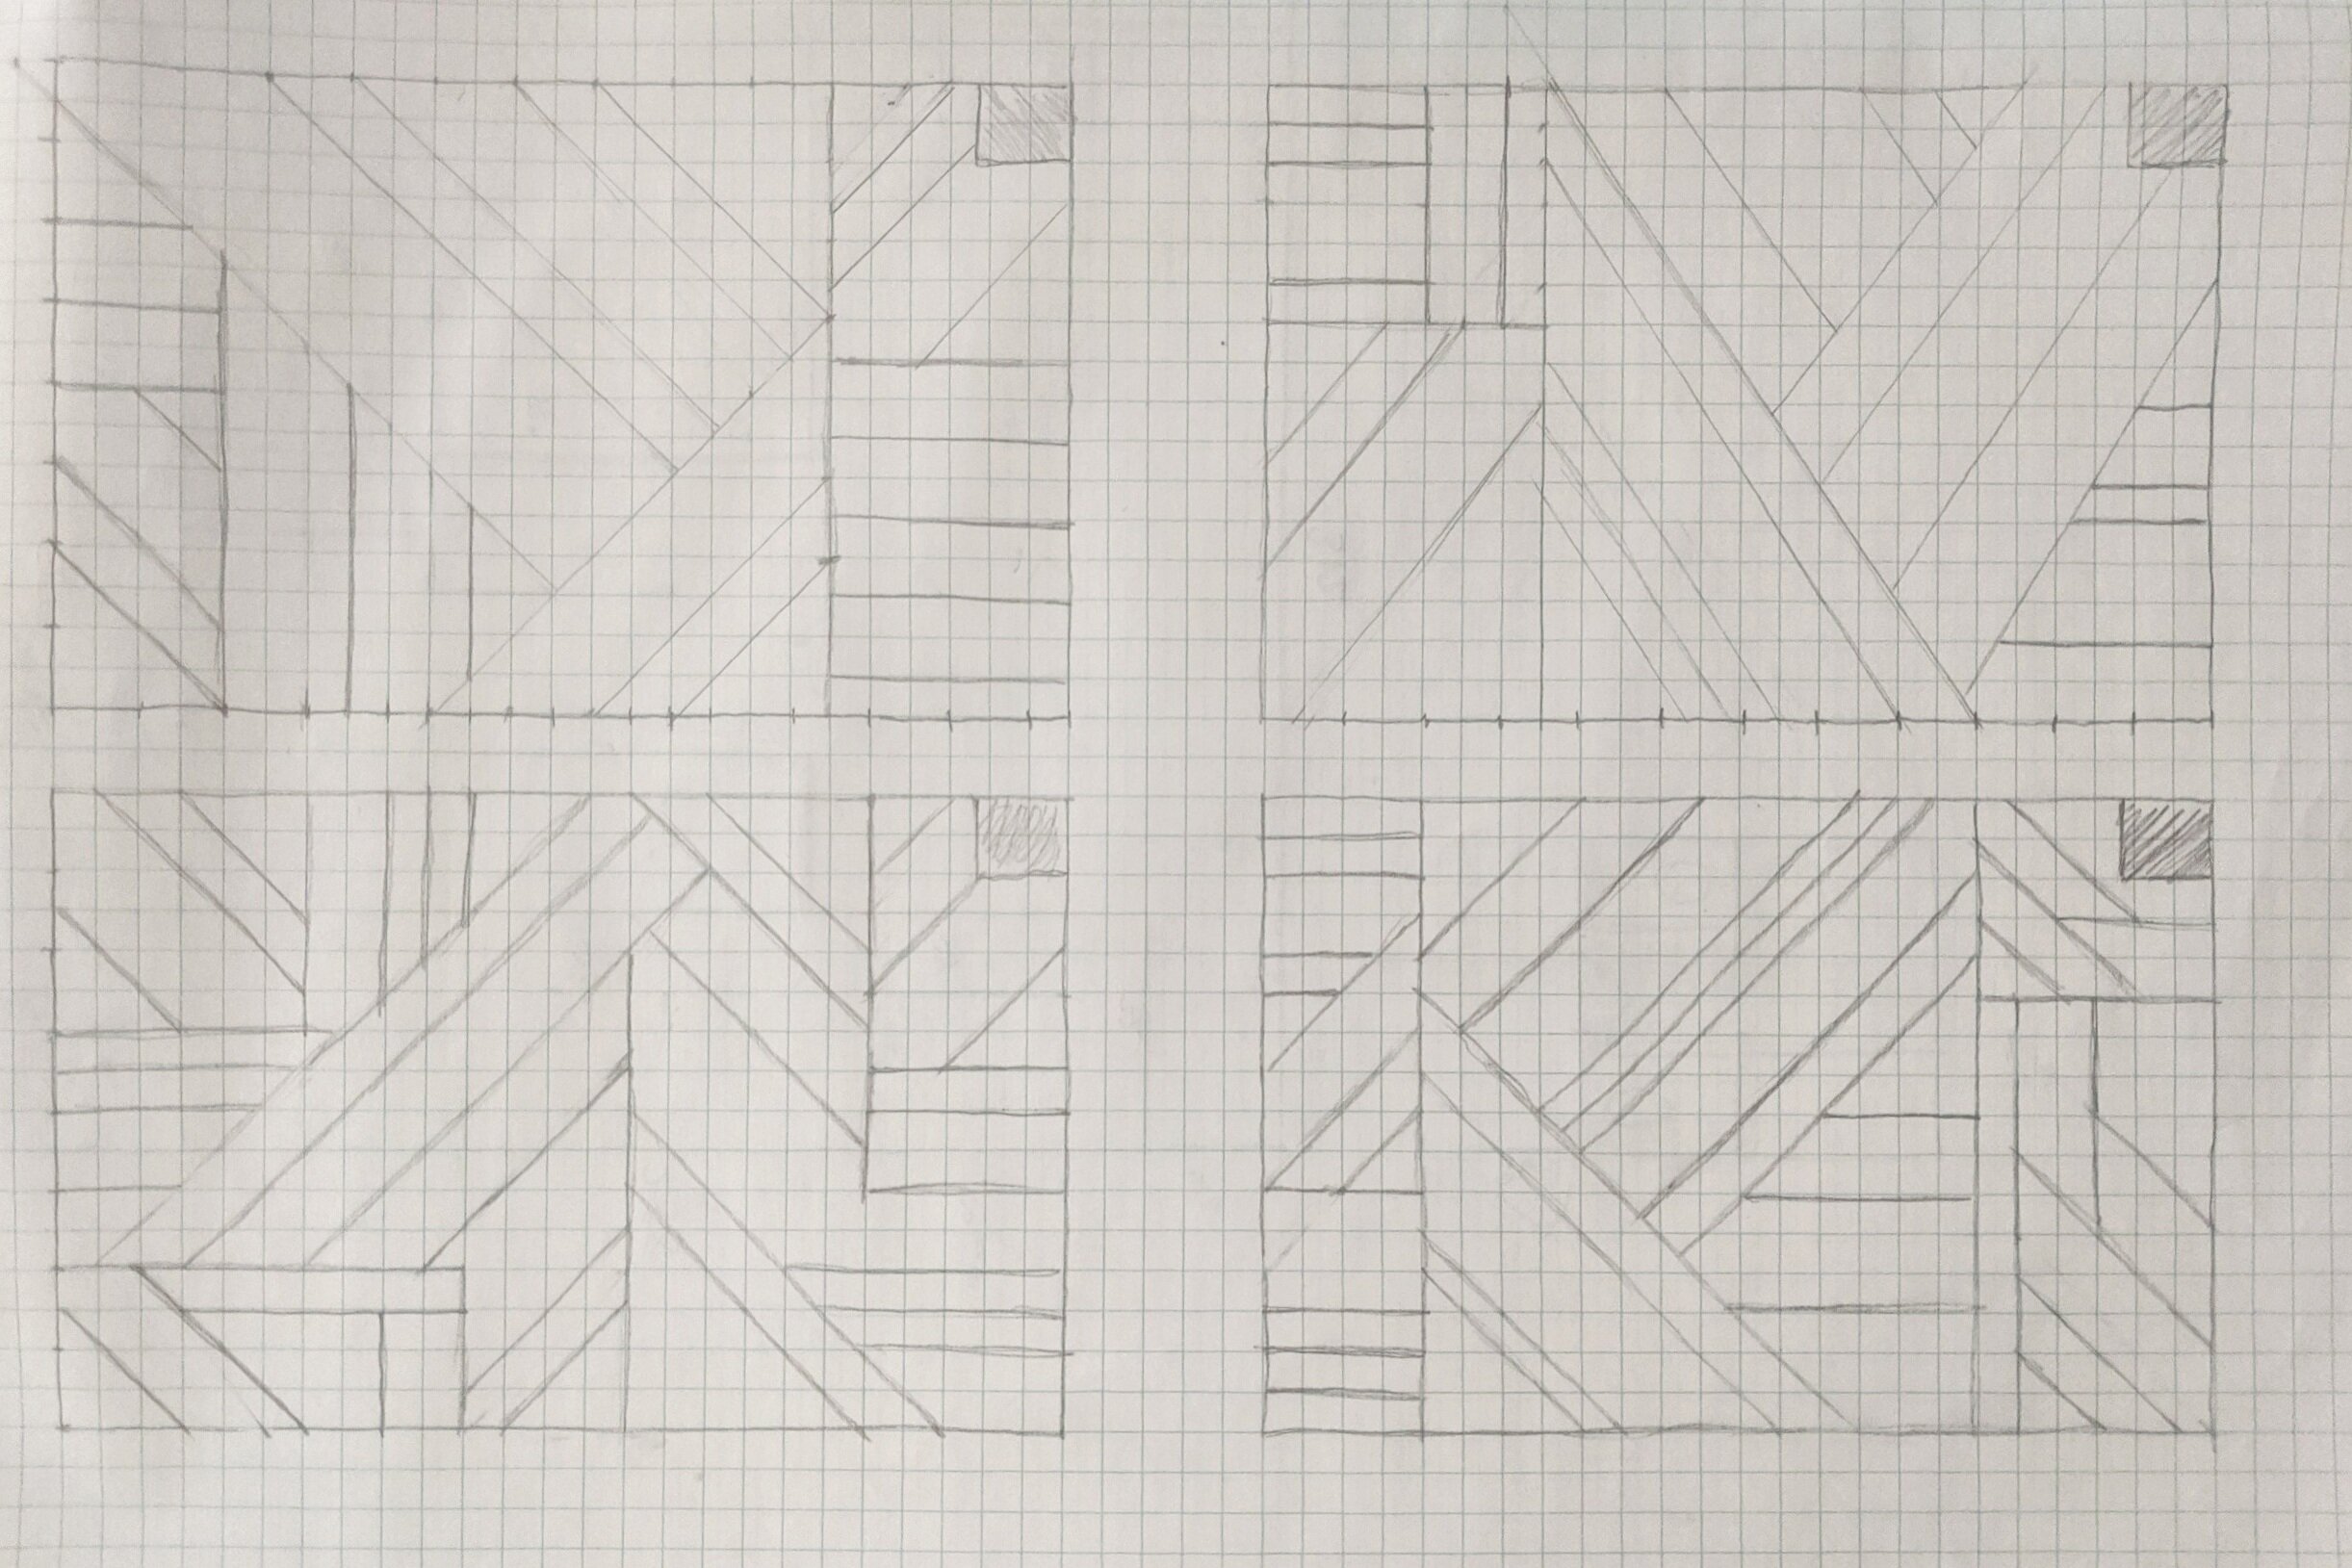
First things first, I started by drafting up a bunch of designs using graph paper. I initially drafted 4 designs and didn’t fall in love with any of them. Then I drafted 4 more. And you know what? I actually didn’t use anything I mocked up!
HOWEVER, I still think this step is important because it gave me an idea of what I definitely did and didn’t want to include in my final design.
Optional Step - Bump Out Your Crown Molding and Baseboards
This step is definitely not required, but I’m really happy we did it.
Since our crown molding and baseboards taper off on the edges, Lucius and I were concerned about how it would look where the MDF boards met up with them. Below is an example of what I’m talking about.

You see how the MDF sticks out further than the baseboard? We wanted a smoother transition. And since we were taking some of the trim off anyway to open the doorway, we just took it all down. Then on the accent wall, we put a piece of MDF up and placed the trim on top of that.

Paint
Once we had the trim finished, I painted the accent wall. This will save you time once your accent wall is installed.
My wall is Desert Lake by Sherwin Williams in an eggshell finish.
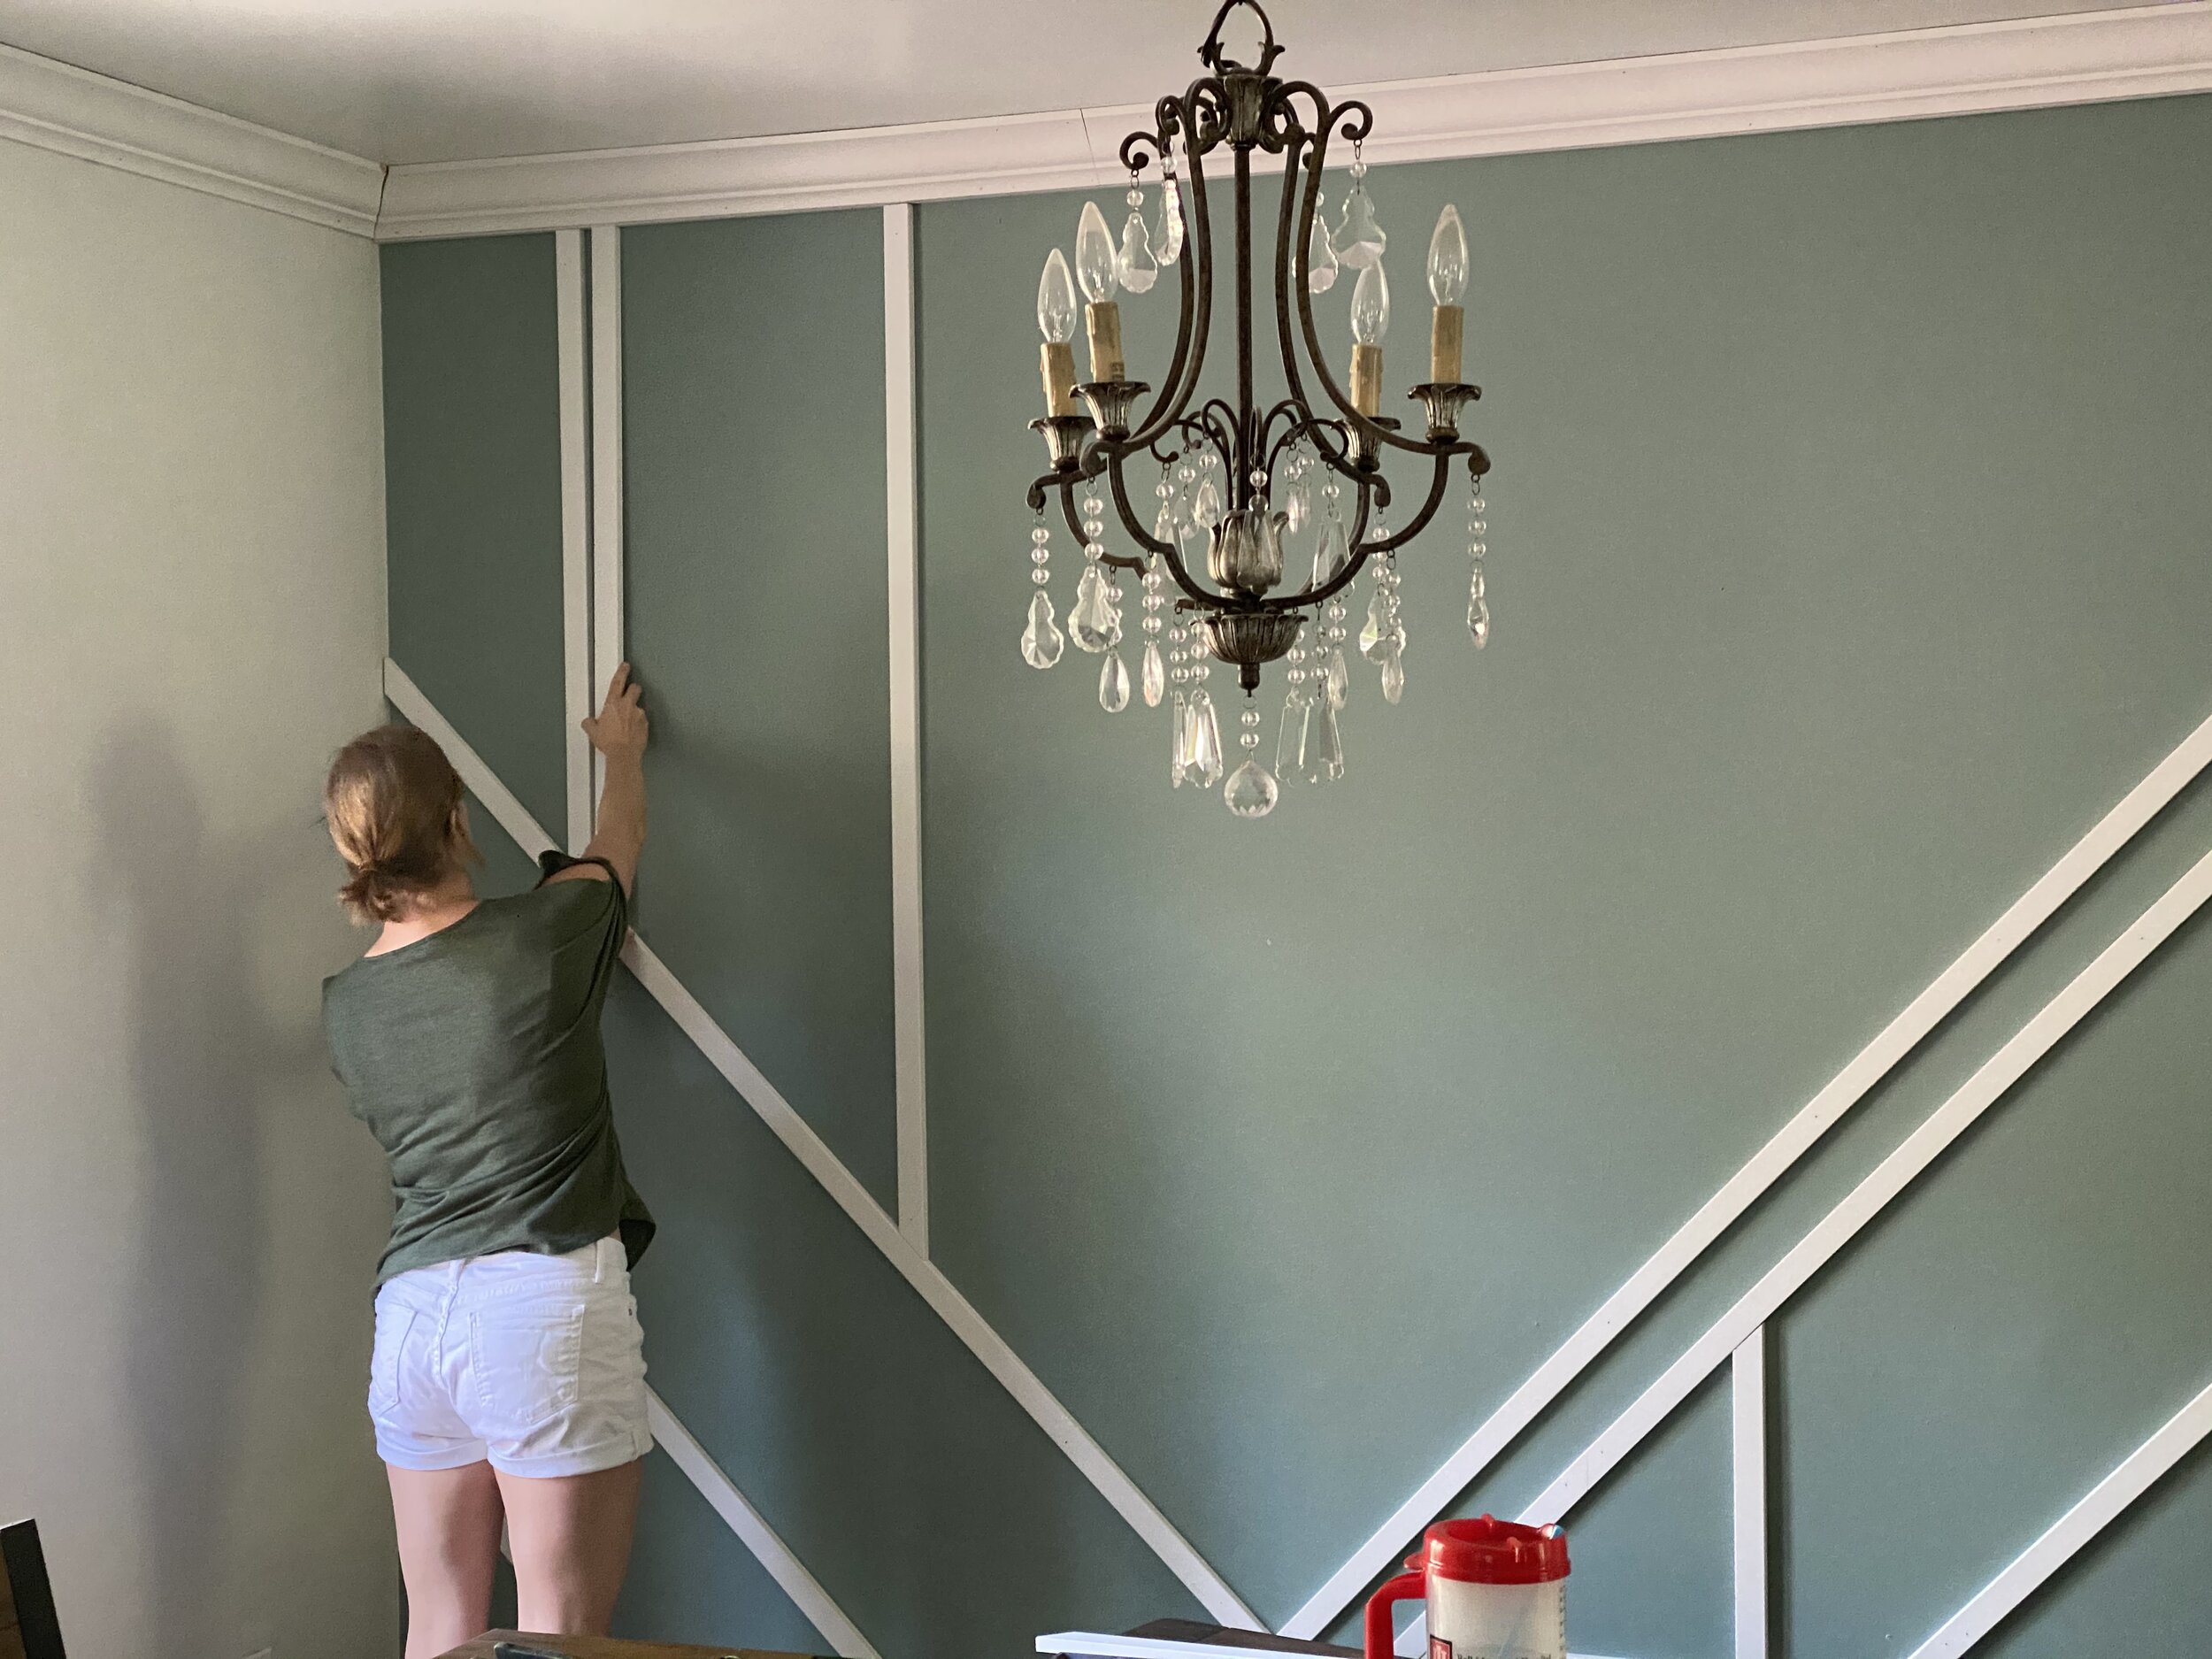
Install Your Accent Wall
Once the paint is dry, it’s time to install your accent wall! Here are a couple of tips to get you started:
Stick with 45 and 90-degree angles
Have an extra pair of hands available (especially when it comes to leveling/nailing the long boards)
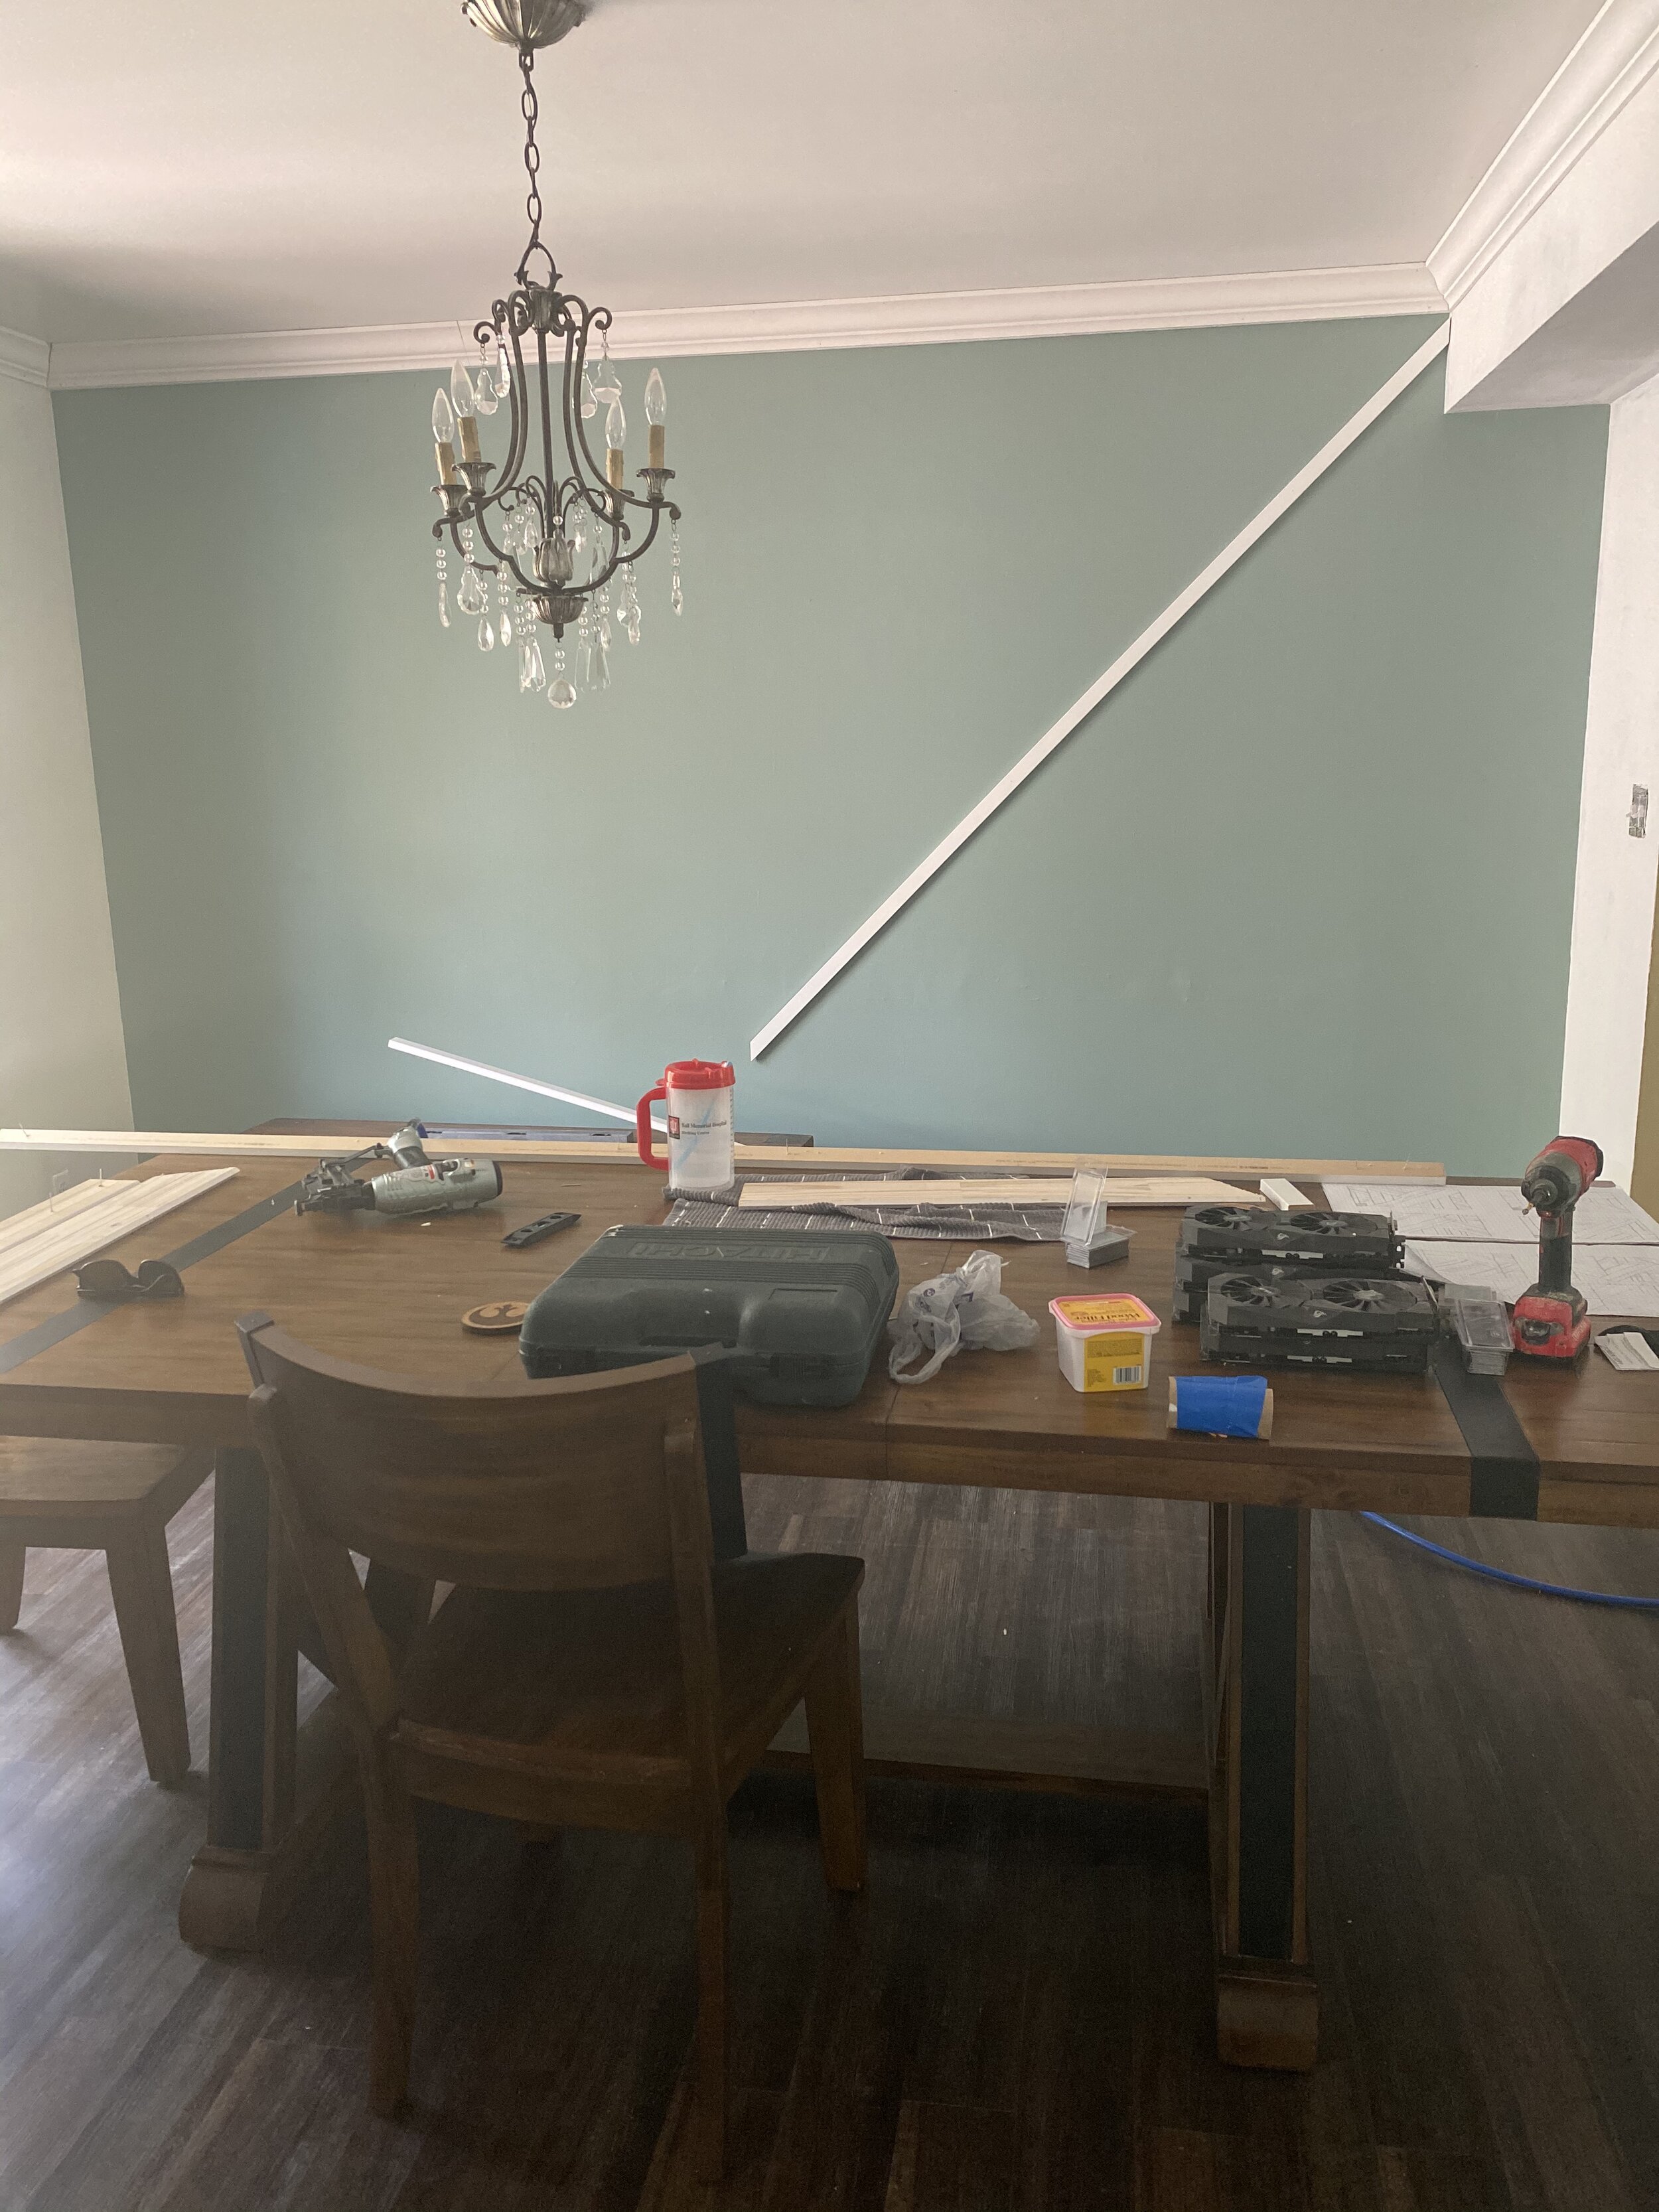
From drafting a bunch of designs, I knew I wanted one long section that went from the bottom left to the top right, so that’s where we started. This also happened to be the longest section and was the trickiest to level and nail.
And honestly, from there we just held up boards at different angles and with various spacing to see what looked and felt right. Then we leveled and nailed as we went - even using some of our scraps as filler pieces!
Once we got into a groove, the install went by really fast and ended up being a really fun project.

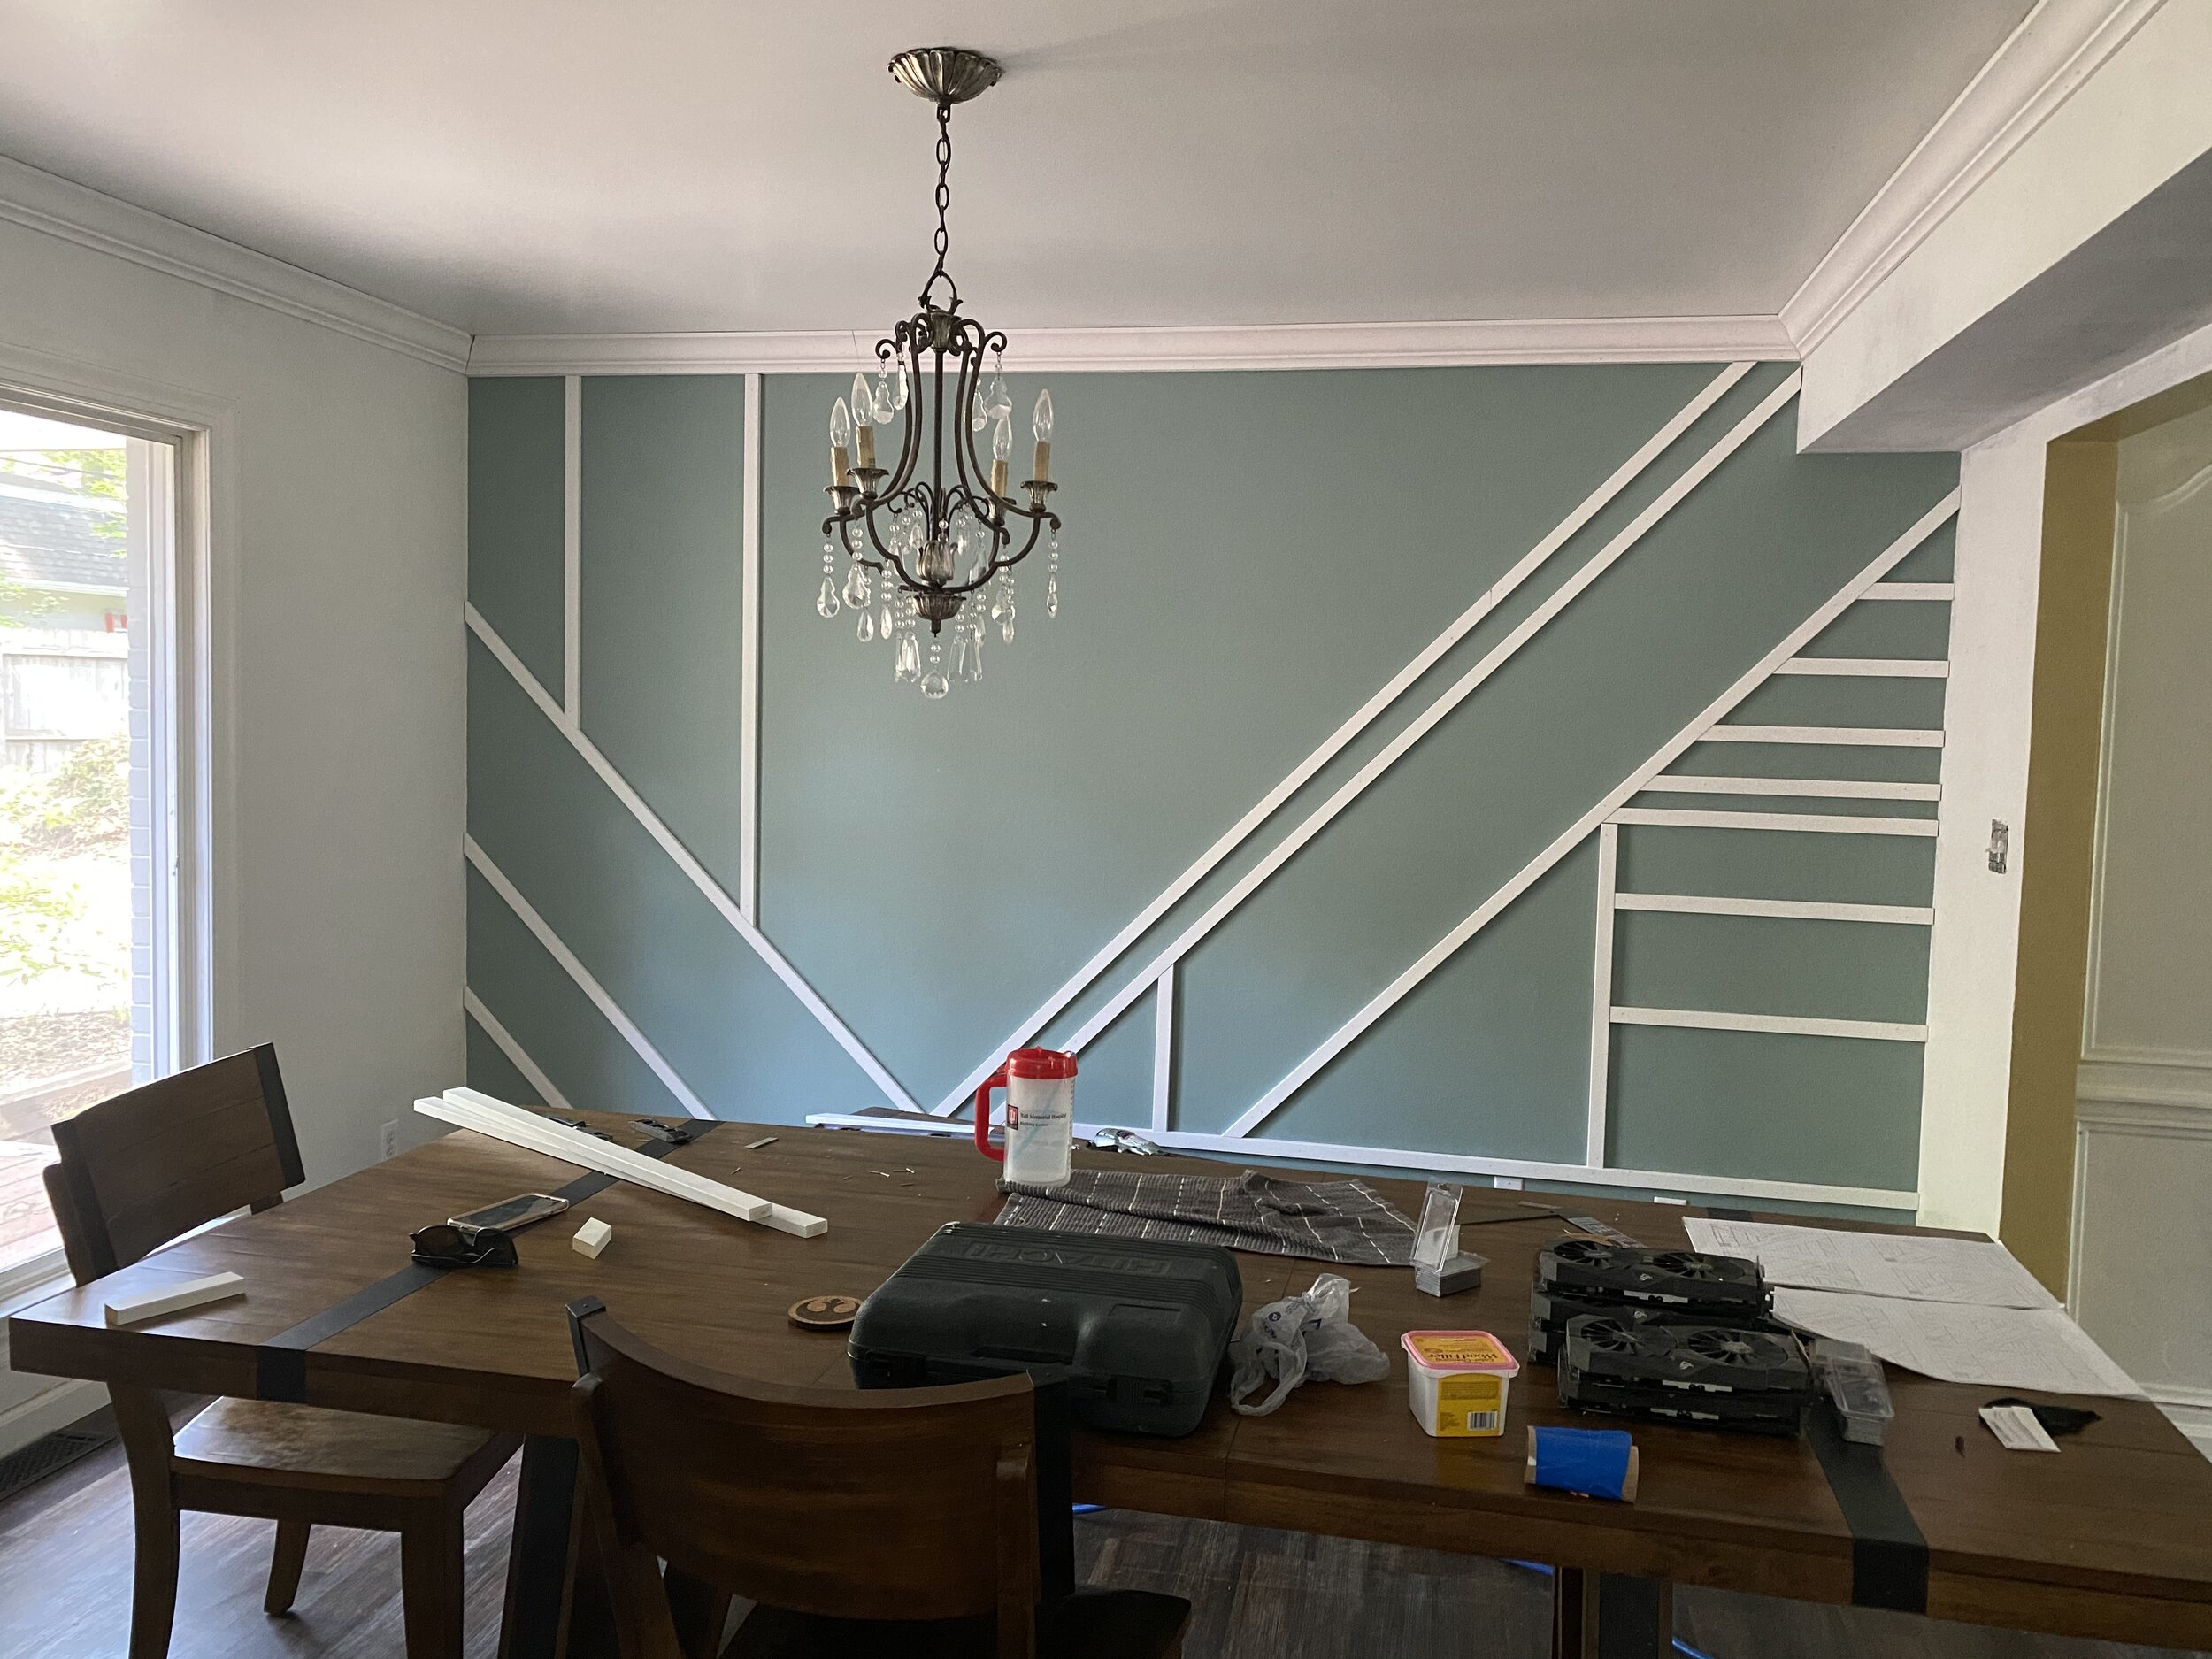
Fill the Gaps
Of course, installing the wall is only part of the project. Now you have to fill your nail holes with wood putty and caulk all your seams.
I caulked along the seams where the MDF met the wall. I also caulked where two pieces of MDF butted up against each other. You could use wood putty or joint compound here instead, which would probably be a smoother transition, but I really didn’t want to sand all that and I’m happy with the final product. I ended up using about 2 tubes of caulk.
Once the wood putty is dry, sand it down. And once the caulk is dry….
Paint Some More!
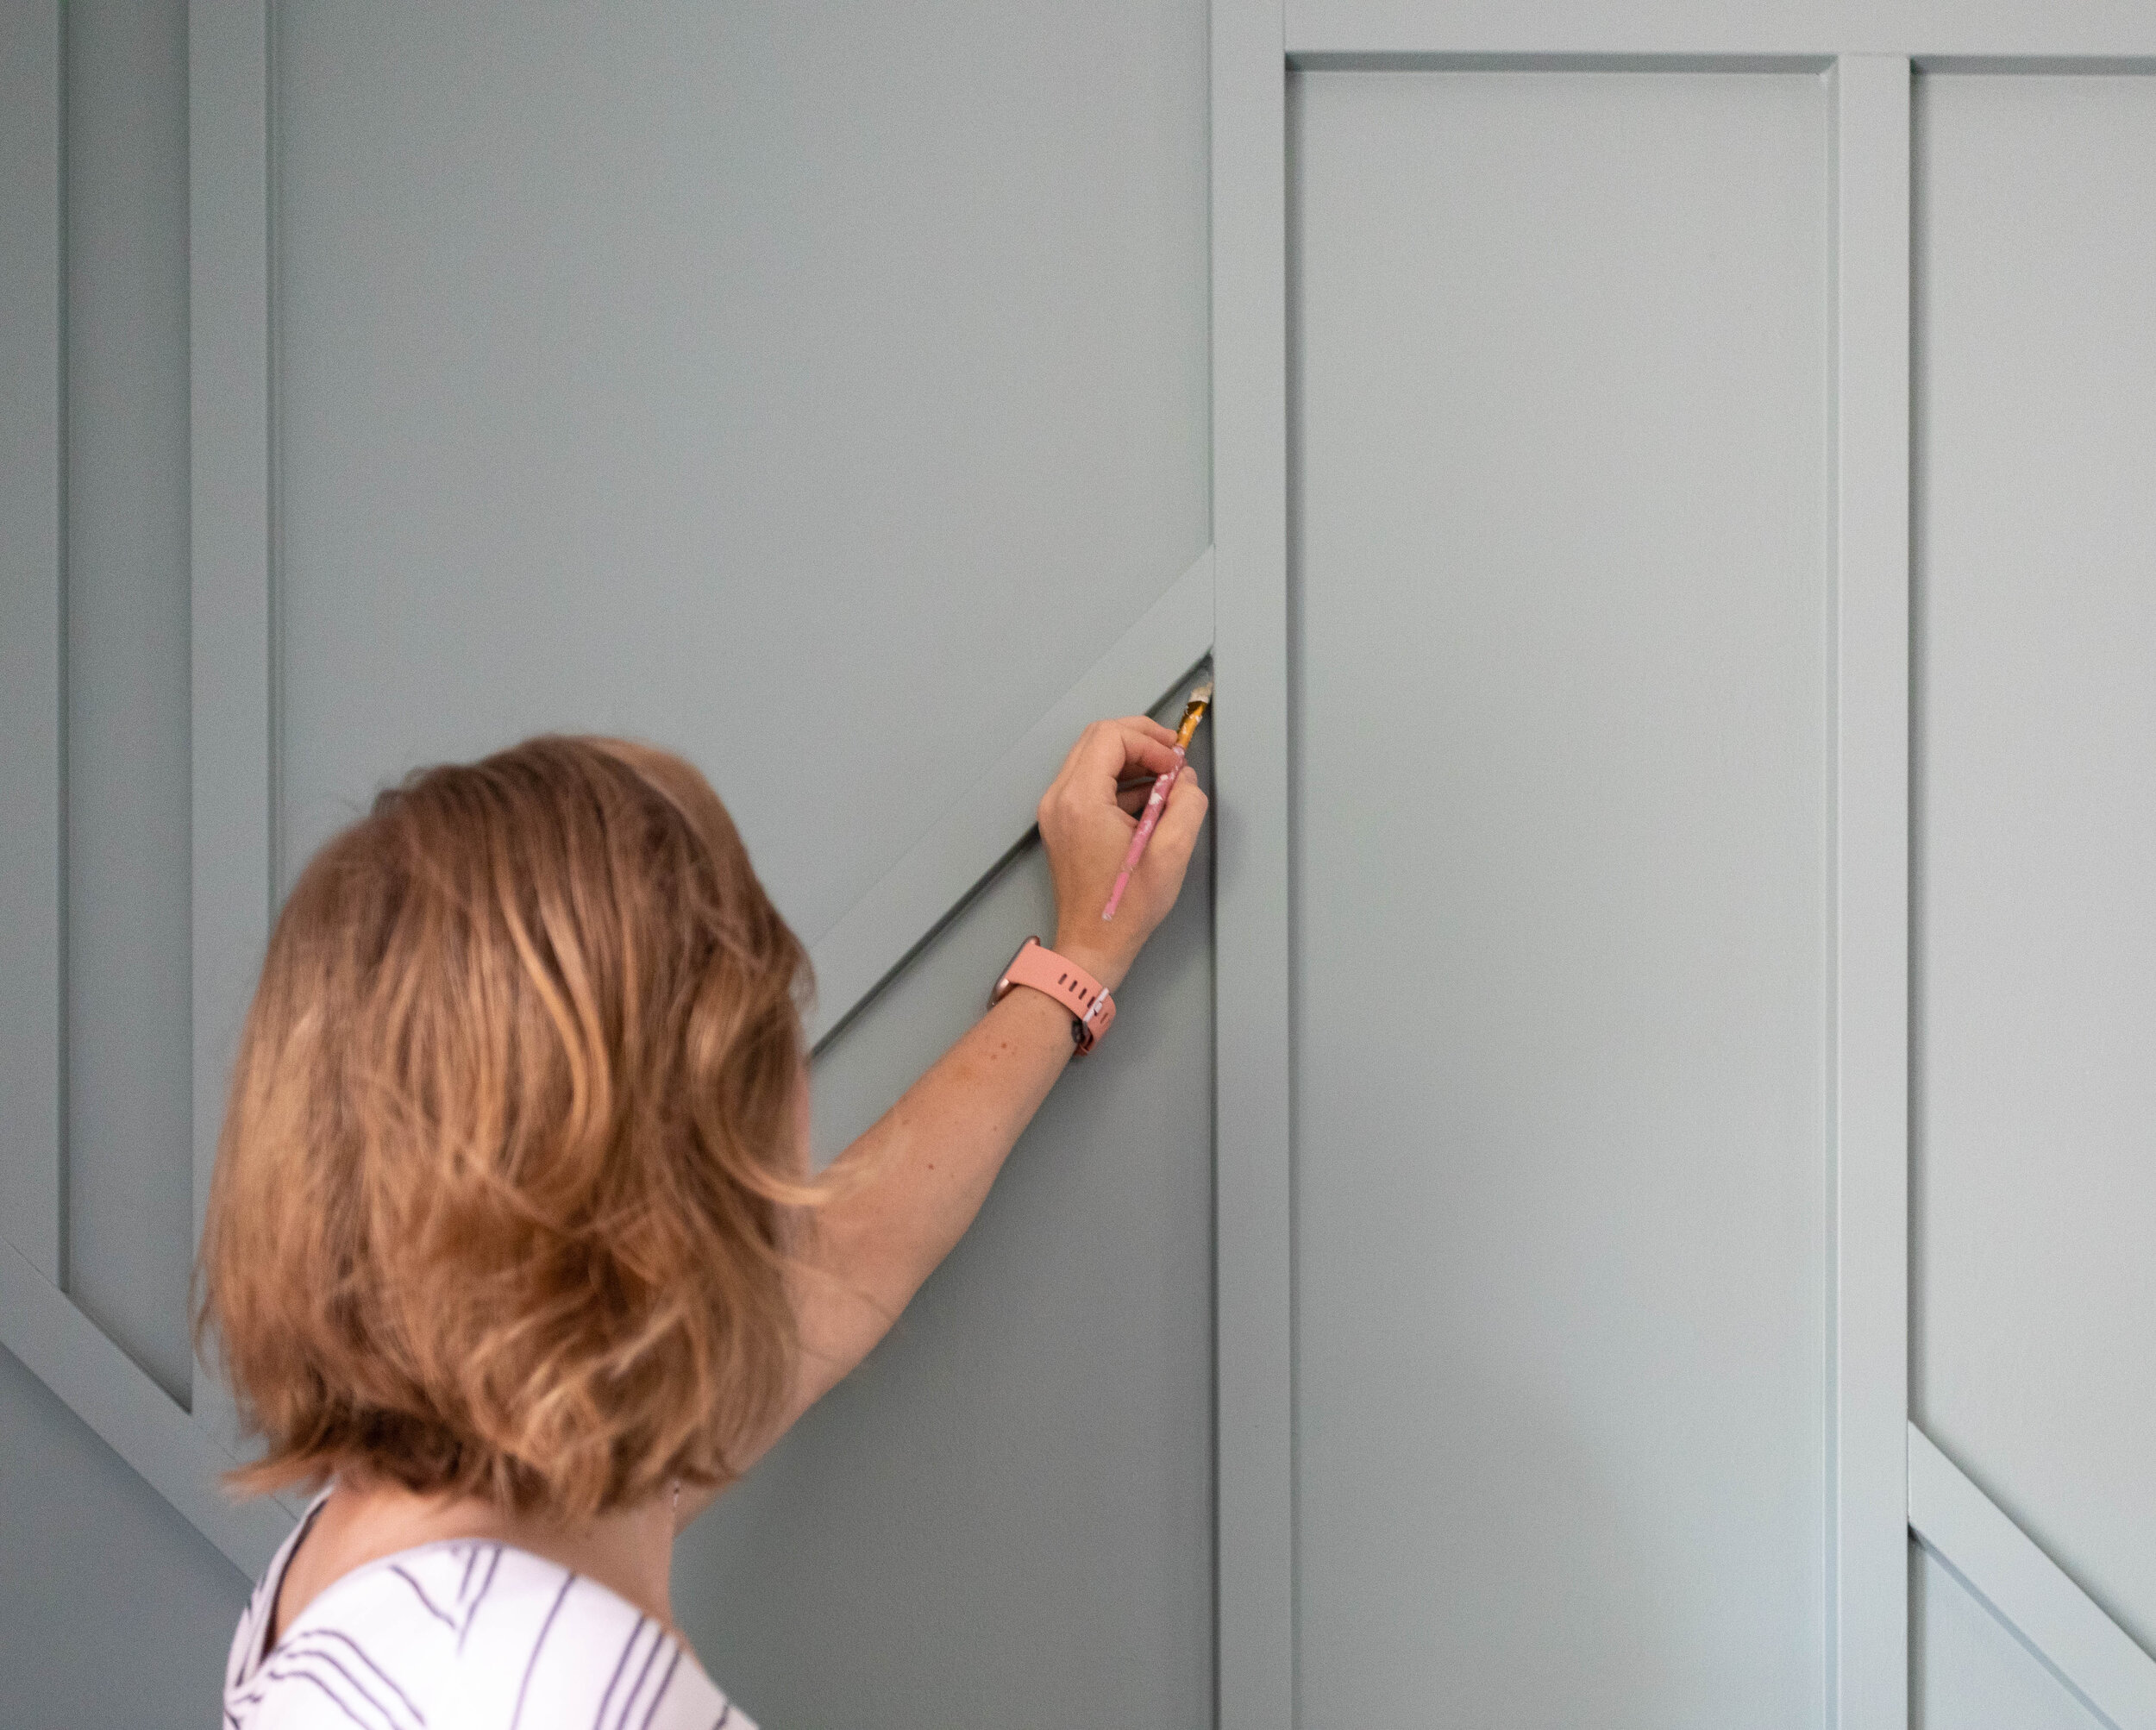
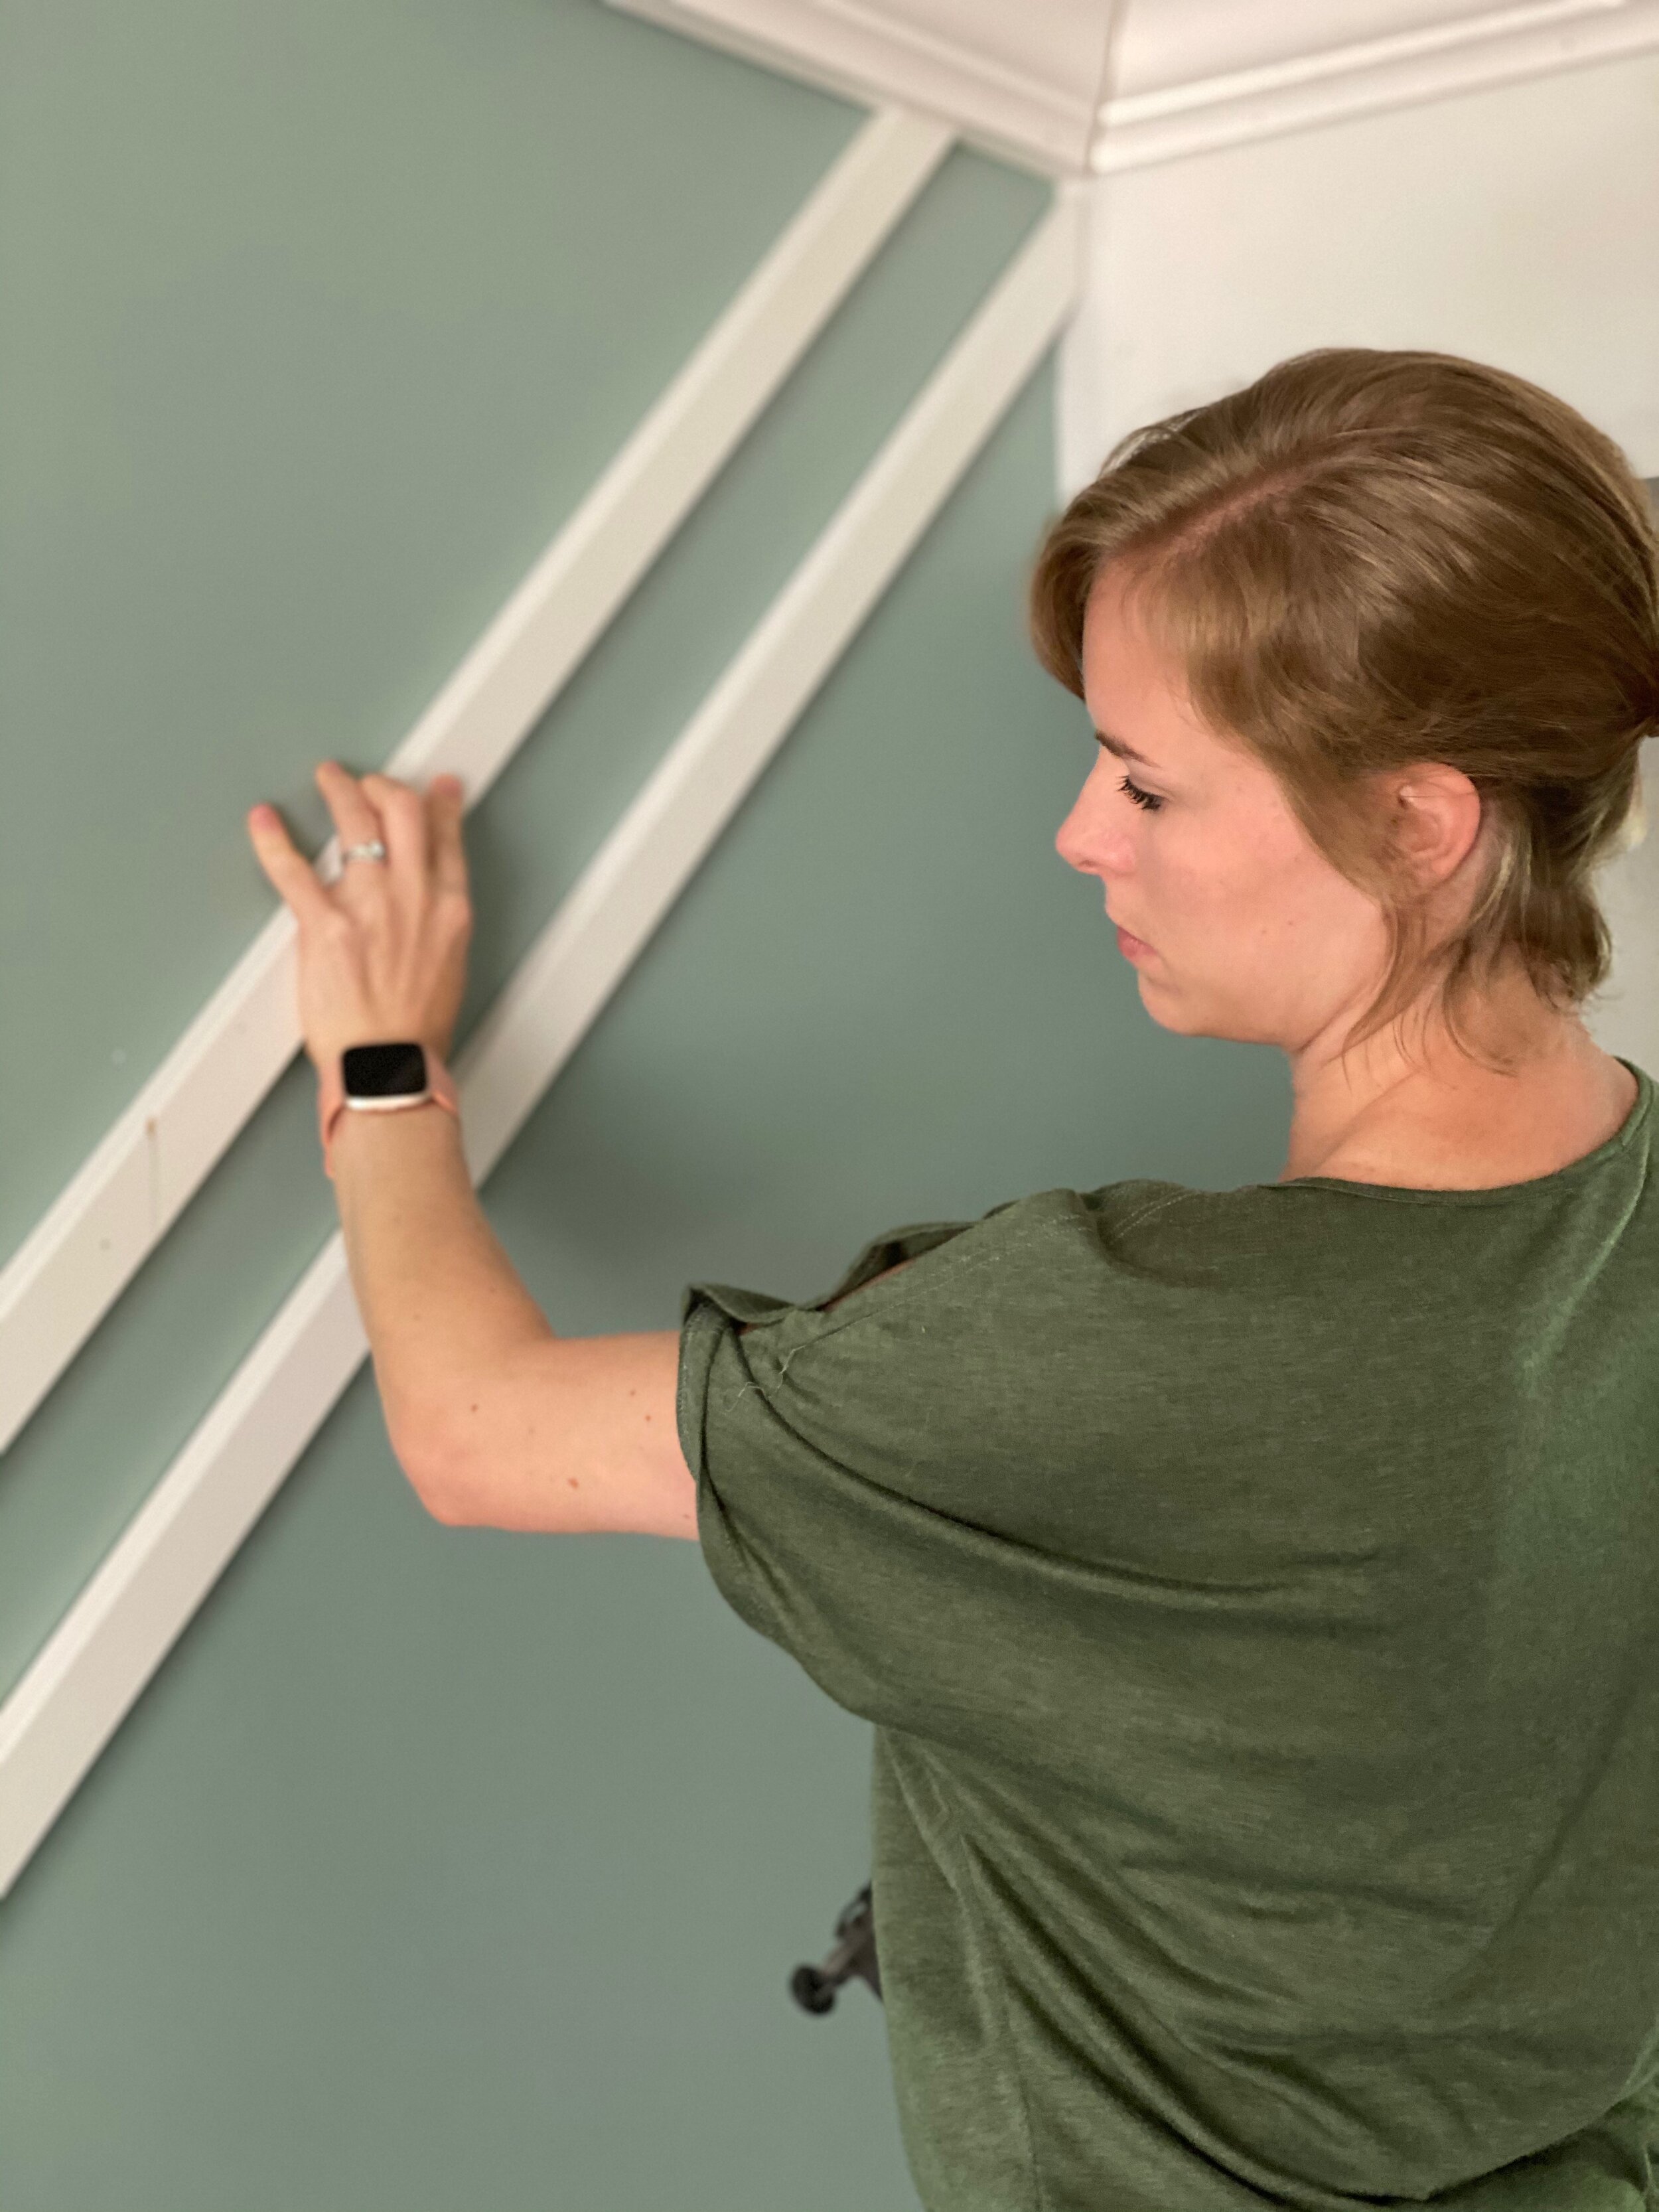
This part of the project gets a little tedious because you have to apply the rest of the paint with a brush, but you’ll get through it (I believe in you).
Make sure you get into every nook and cranny. I used a craft brush in the really tight spots where my boards met with an adjacent wall or the trim. You’ll definitely want to brush on two coats.
Once your paint is dry, you’re done! Now you can style your room and enjoy!
Final Thoughts About Our Geometric Accent Wall

I’m head over heels in love with it! Before this renovation, our dining room was so out of place. It was like it belonged in a different house. Although our house is still a bit of a mixture of different styles (there are several rooms we haven’t touched yet), it’s well on its way to having a cohesive look.
The only thing left to do now in this room is to fill it, and I.CAN’T.WAIT. And you better believe that light fixture is getting the boot! Watch for that post in the next couple of weeks!
Related Dining Room Renovation Posts
Build Your Own Geometric Wood Feature Wall

Chandelier and Area Rug Roundup + Dining Room Mood Boards!
Now that the DIY Sharpie wall in my office is complete, and while we’re waiting for materials for the master suite to arrive so we can start rebuilding, I feel like I can finally turn my focus back to the dining room.
I’ve developed a pretty good vision of how I want it to look, but, as I’ve mentioned before, I’m very indecisive. So, I put together some mood boards of the dining room with different lighting and area rug combinations to help quell my indecisiveness. And MAN, did I get nerdy with it.
This post may contain affiliate links, meaning I receive commissions for purchases made through those links, at no cost to you.
Now that the DIY Sharpie wall in my office is complete, and while we’re waiting for materials for the master suite remodel to arrive, I feel like I can finally turn my focus back to the dining room.
I’ve developed a pretty good vision of how I want it to look, but, as I’ve mentioned before, I’m very indecisive. So, I put together some mood boards of the dining room with different lighting and area rug combinations to help quell my indecisiveness. And MAN, did I get nerdy with it.
But before I jump into the mood boards, I wanted to share with you a roundup of affordable chandeliers and rugs that I’ve considered for this room - and that you might enjoy too!
RELATED: If you want to see how this room started, visit these posts HERE and HERE.
Chandelier Roundup
All of these chandeliers are below $250 except for numbers 11 and 13, which are just a hair over $250, but they’re so beautiful so I had to include them - plus, number 11 is a steal since it’s 40% off right now!


1 / 2 / 3 / 4 / 5 / 6 / 7 / 8 / 9 / 10 / 11 / 12
I feel like I need to state that although I love all the light fixtures and rugs above, Lucius does not. He’s really not a fan of Sputnik light fixtures, so numbers 2 and 4 were an immediate no-go, and I’m still trying to win him over on Oriental rugs. That’s one of the challenges of decorating with a significant other - you have to think of their style too.
As with most projects, including this one, I tend to narrow down my favorite items using Pinterest and then show them to Lucius so he can tell me which ones he hates the least. Using that process, most of the time we can come to an agreement pretty easily! #winwin
A couple of quick notes before I share the mood boards:
The dining room set I have in these mood boards isn’t our exact set, but it is similar in style and color, so I figured it was a good placeholder.
I’m using a paint color similar to what was used in my inspiration picture, so I just used that image as the background in my mood boards.
I have specific requirements for dining room rugs - mainly that they can help hide stains because kids + food = alllll the stains. That being said, I mostly went for patterned and/or colorful rugs that would hide/camouflage some of those inevitable stains.
And lastly, I didn’t create a mood board for all the light fixtures and area rugs - that would be crazy. But I was tempted! Instead, I created them for just some of the combinations until I felt like I was getting a clearer picture of how I want the room to look.
Okay? Okay! And now for the fun part…
Dining Room Mood Boards
Option 1 - Oriental Rug/Industrial Chandelier

Pros: Although incorporating oriental rugs into our house is one of the design struggles I have with Lucius, even he agreed that he didn’t hate this one. Even though it has some geometric shapes, it’s a softer, distressed finish and I think that allows it to work with the lines in the accent wall, rather than compete against them. I also like how modern and contemporary the chandelier is and how it ties the different design elements together.
Cons: The carpet is on the dark side, which makes me nervous since the dining table and the laminate in the rest of the room are pretty dark. I’d like to lighten the space up some.
Option 2 - Oriental Rug/Farmhouse Chandelier

Pros: I think the farmhouse style can be done really beautifully, but it’s just not my jam. However, I’m really drawn to this light fixture. And of course, I love me an Oriental rug.
Cons: There’s a LOT going on with this combination. The pattern on the rug is too defined and definitely competes with the wall. Also, it’s still darker than I’d like. Additionally, I think the lines in the chandelier compete with the lines in the wall as well.
Option 3 - Abstract Rug/Geometric Chandelier

Pros: Although I’m really trying to find a way to get an Oriental rug to work in this room, this abstract rug makes me really happy. I think it’s the bright pop of gold/yellow that seems like it really brightens up the room. Plus, that light fixture is gorgeous!
Cons: I’m concerned that the rug will have too much blue in it in real life and will clash with the call color. I also have some hesitations about the light fixture being a little too geometric for the space.
Option 4 - Oriental Rug/Farmhouse Chandelier

Pros: I’ve been swooning over this rug forever, but just haven’t found a place in our home that it makes sense. I love the colors and design. And I actually think the pink/orange color in it goes nicely with the green accent wall. The chandelier I think helps pull out some of the curved lines in the rug and the color ties in nicely with the dining set.
Cons: Lucius hates both the rug and the chandelier - but sometimes I like to throw ideas out there even if I think he’ll hate them - sometimes he doesn’t! (Most the time he still does.) And honestly? This combination just doesn’t catch my eye as much as I thought it would.
Option 5 - Oriental Rug/Brass Chandelier

Pros: I’m loving the contrast that the bright rug and brass chandelier bring to this space. And I actually think the pattern of the rug and the curves of the chandelier work nicely against the straight lines in the accent wall.
Cons: I’m still trying to win Lucius over as far as incorporating brass into our house goes. I’m not quite there yet (don’t worry - I’ll wear him down), so this light fixture was definitely a no-go. Besides that, we currently have very little orange in our house decor so bringing in such a bold rug would be tricky without adding more orange throughout the house.
Option 6 - Oriental Rug/Brass Wagon Wheel Chandelier

Pros: I LOVE this light fixture. The more I look at it the more I like it. I love how the curves in the chandelier break up the straight lines in the wall and brass/oil rubbed bronze finish adds some more dimension. The rug is pretty but…
Cons: I actually don’t like the rug in this space at all. I’m not fond of the purple in the rug next to the green in the walls and I think there are way too many areas without a pattern that would definitely not hide food stains.
Option 7 - Abstract Rug/Industrial Chandelier

Pros: I had to try out another abstract rug, and I’m actually liking this one quite a bit too! It’s a lot brighter than a lot of the other rugs I’ve looked at, which would be great in our dining room since it can be pretty dark sometimes. The chandelier is also pretty great. I love the curved lines and the brass/oil rubbed bronze combination.
Cons: I worry a little that this rug has more blue than green, which could look weird against the accent wall. As for the chandelier, I’m not sure I can convince Lucius to go with it.
Final Thoughts
There are ENDLESS combinations that I could have put together, but I know eventually I have to just make a decision and run with it. We’re still working on reinstalling the trim and installing the accent wall so I have a little time, but while I continue thinking it over, I’d love to hear which option or combination you like most! Let me know if the comments! Who knows? Maybe you can sway my opinion.