Half-Bathroom Budget Breakdown
/My Tips for Renovating on a Budget
Wanna know how much it really cost to completely renovate my half-bathroom? Find it here with an itemized breakdown!
Budgets are so subjective. What may seem super expensive to one person could be nothing to the next person. In fact, a quick Google search varies in estimates for a half-bath remodel from $2,500 all the way up to $15,000! That's a pretty gigantic range.
I’m an insanely budget-conscious person. Truth be told, I’m actually kind of terrible at spending money. So, naturally, I aimed to renovate my bathroom on the absolute lowest end of the range without sacrificing the overall style I wanted.
My goal was to renovate this bathroom for $2,000. Do you think I stuck to my budget?
As an Amazon Associate, and partner with other brands, I earn from qualifying purchases. This post may contain affiliate links, meaning I receive commissions for purchases made through those links at no cost to you.
Itemized Half-Bath Cost Breakdown
- Drywall: $21.96
- Misc Materials (Spackle, Adhesive, etc): $45.46
- Black & White Penny Tile: $178.46
- Grout & Sponges: $46.95
- Schluter Edging: $18.99
- Thinset: $26.98
- Beadboard: $71.97
- Wall/Trim Paint: $52.94
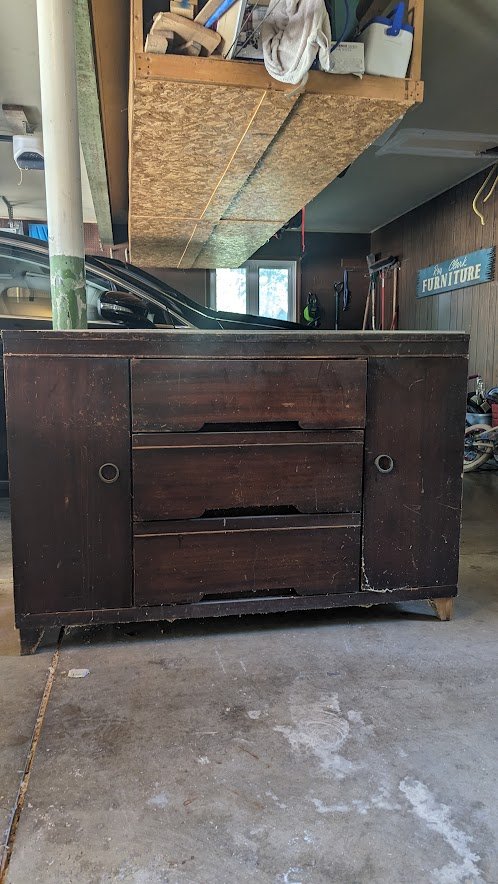
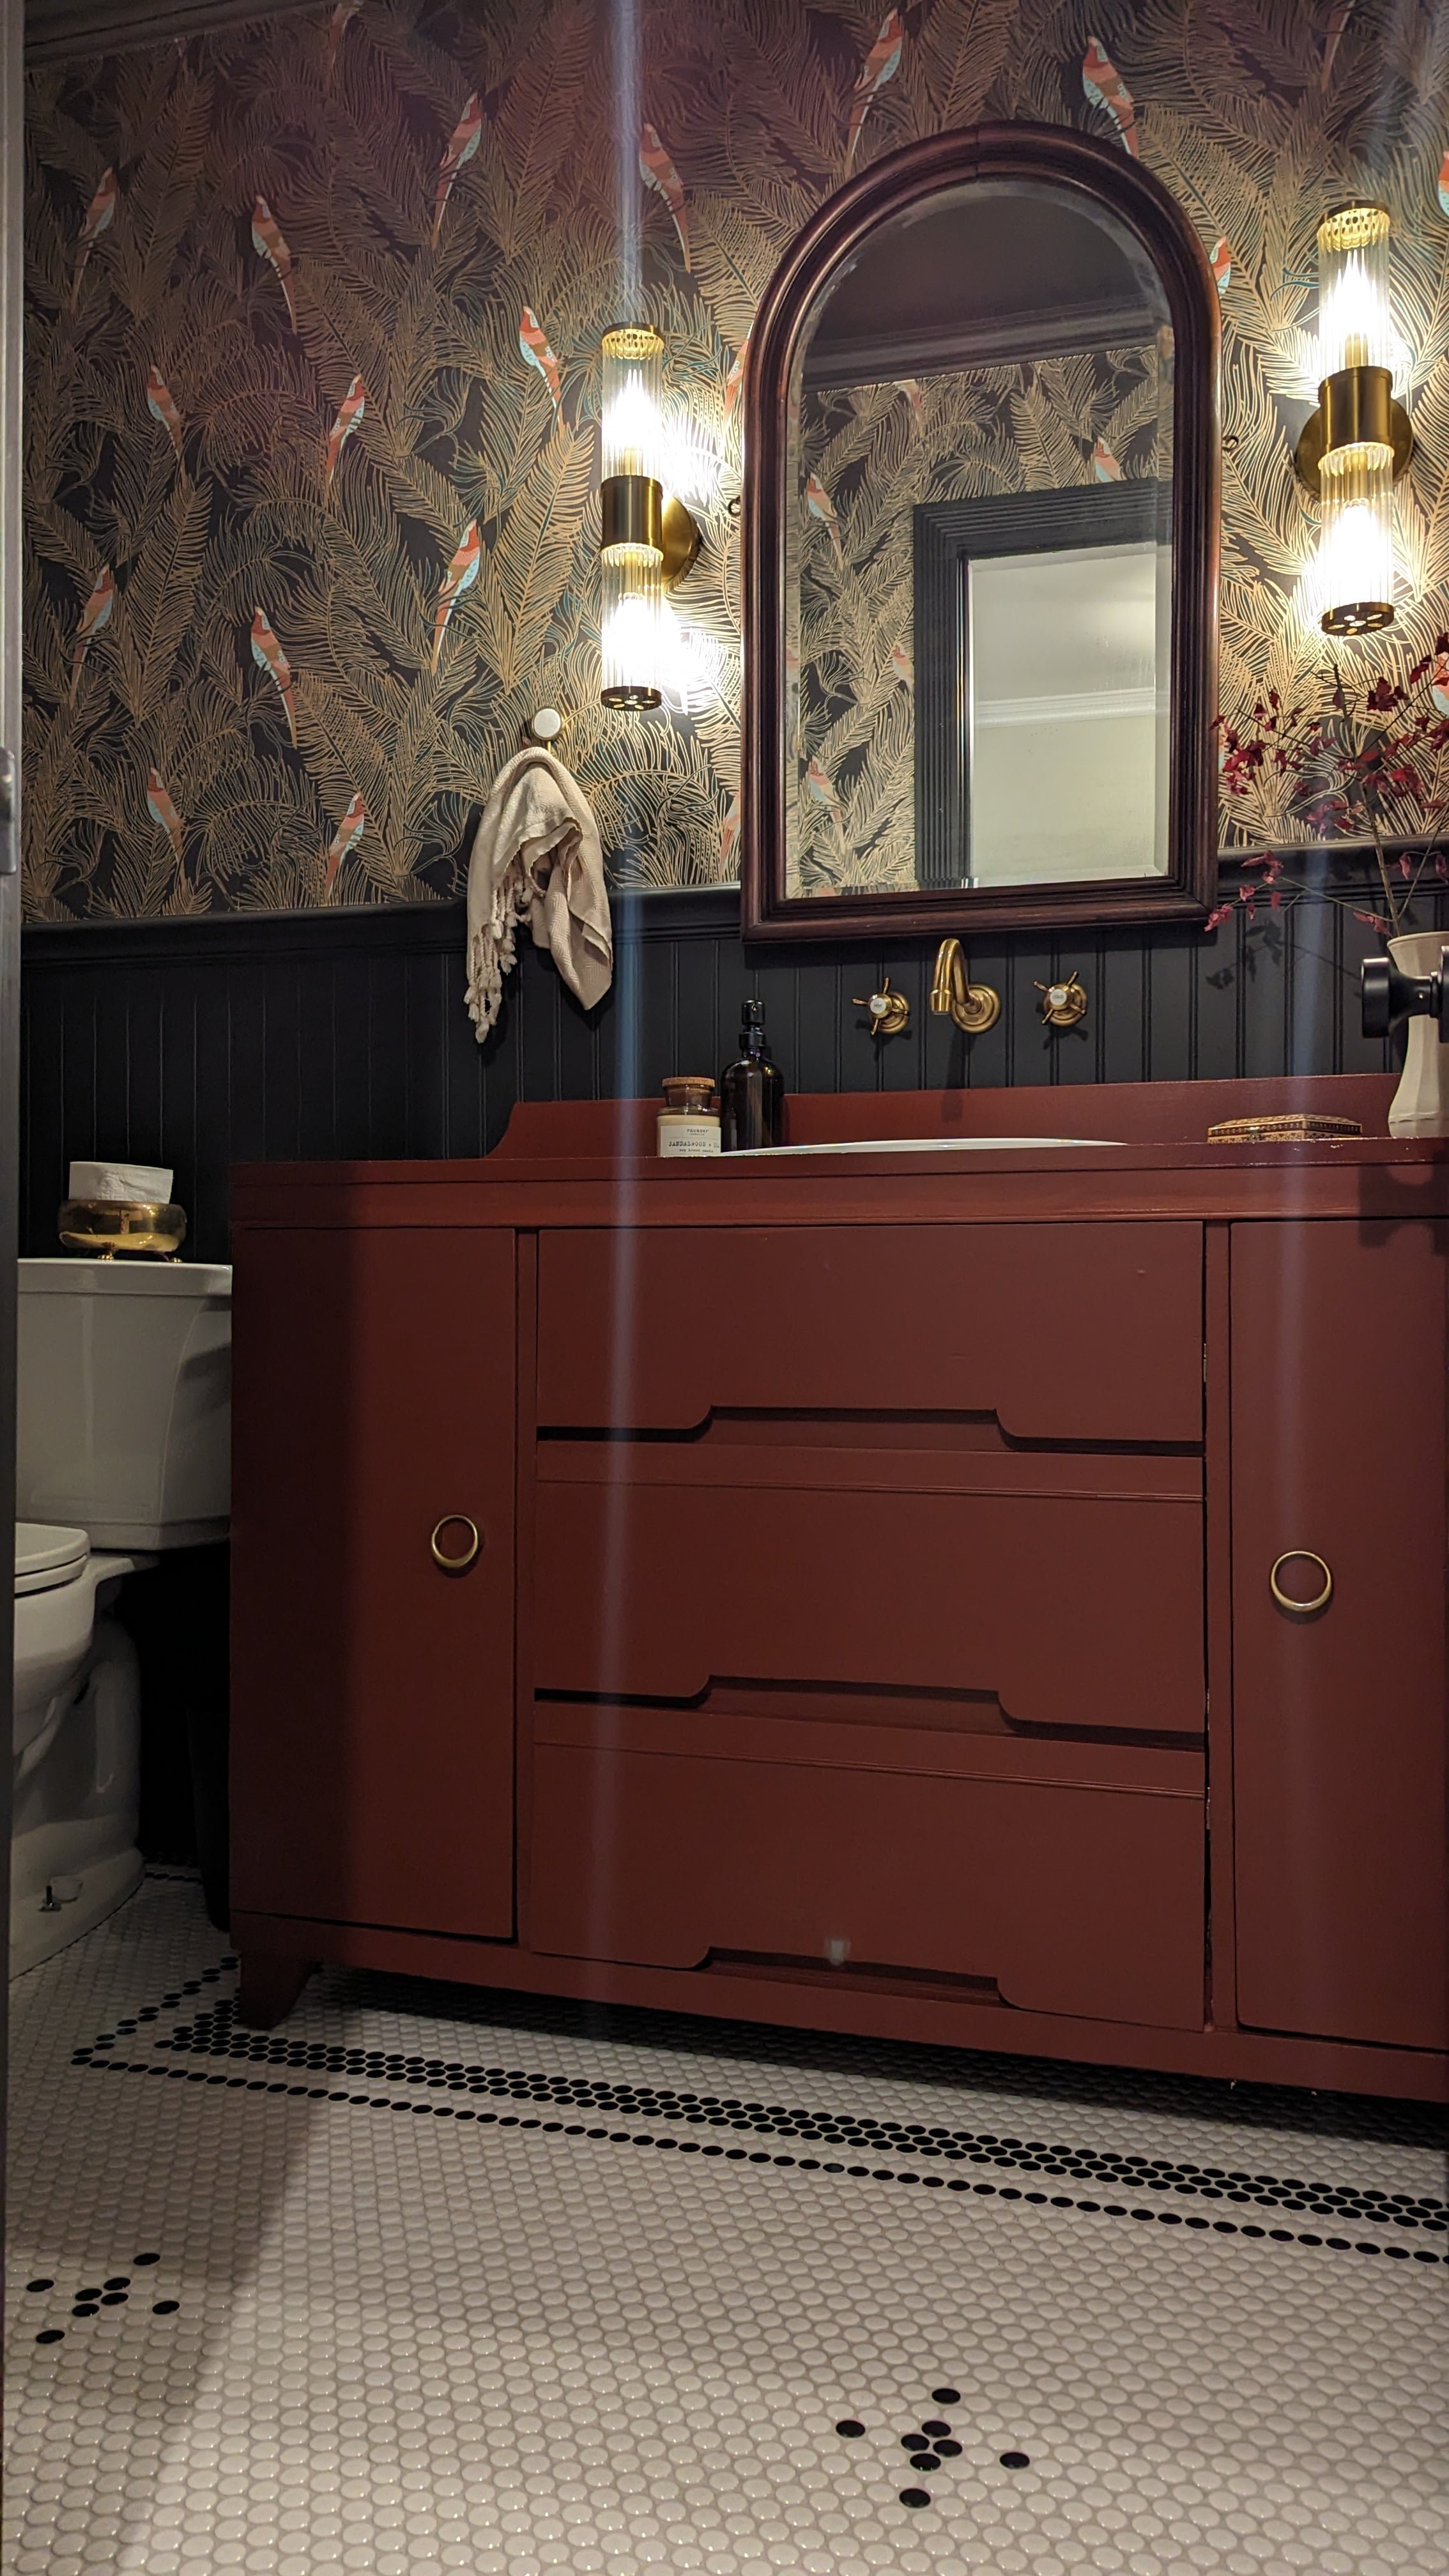
- Console Table (aka Vanity) & Backsplash: $104.62
- Vanity Paint/Sealer: $78.87
- Vanity Hinges: $25.17
- Sink: $110.85
- Faucet: $115.99
- Plumbing: $43.39
- Misc (Decor, Toilet Paper Holder, Trash Can): $32.21
- Electrical: $93.40
- Door: $112.35
- Door Trim: $74.95
- Door Hinges/Stop/Knob: $46.23
- Toilet: $179.00
- Wallpaper: $402.00
- Wallpaper Smoother: $1.99
- Wallpaper Paste: $24.98
- Wallpaper Primer: $29.98
- Baseboard: $31.52
- Chair Rail: $34.16
- Crown Molding: $44.97
- Sconces: $107.58
- 7% Tax: $149.52
- Total: $2,285.48
Okay, so I didn’t quite hit my goal of keeping my half-bathroom renovation to $2,000. But, considering I replaced everything in this bathroom aside from a few sheets of drywall, I’d say I came pretty darn close!
Here’s how I renovated my bathroom for less than $2,500:
DIY vs. Hired Labor
Bottom line, the biggest reason I was able to keep my budget so low with this renovation is because I didn’t hire out any of the labor. The labor alone for this renovation would have likely blown my budget before I got started. Lucky for me, I really enjoy DIY, so doing it all myself didn’t feel like a chore in the least!
I Didn’t Buy Any New Tools
If you notice, in the budget breakdown, I didn’t include the cost of any tools. That’s because I already owned most of the tools I needed. And I borrowed the few tools I didn’t have from a friend.
I realize this isn’t a reality for everyone. Buying new tools would definitely increase your project cost. However, keep in mind that once you buy a tool, you get to use it over and over again on future projects!
Related: 10 Best Tools for DIY Beginners
Compare Prices
Whenever I’m sourcing items for a room, I spend an excessive amount of time looking for the best deals without sacrificing quality. The penny tile in this room is the perfect example.
It was really tricky to find a resource that sold both black and white penny tile at a reasonable price (black penny tile was surprisingly hard to track down!) I was close to buying mine from Tile Bar because they sell both colors for a fair price, but the shipping added 1/3 of the cost!
I found tiles at Floor and Decor, but I was nervous about how they’d look next to each other since they were from different brands. Luckily, I had a chance to stop by a store to see them side-by-side, and they looked great together.
Know When to Splurge and When to Save
I knew wallpaper would be a huge part of my bathroom design. But I also know that wallpaper can get really expensive really fast.
Although I definitely splurged by using wallpaper in my bathroom (it was over $400 for just the wallpaper), I saved a lot of money by installing beadboard on the bottom half of the room. Not only is beadboard really inexpensive (only $72 for all the sheets I needed), but it adds so much character!
Buy Secondhand
Buying secondhand items is not only a great way to add character to a space, but it is also a big cost-saver. The mirror and almost all of the decor are secondhand, but the biggest secondhand item in this bathroom is the vanity.
While I sacrificed a stone top for the vanity (which would have significantly added to the cost), a few coats of Polycrylic easily made the top waterproof. In addition, I never would have been able to find a store-bought vanity in the color I wanted, and I know I would’ve been hesitant to paint something new.
Final Thoughts
It’s easy to watch people transform their homes in what looks like an instant (hello, Instagram transitions) and with infinite funds. I hope this blog post, as well as following along during this entire renovation, helps give you insight into some of the behind-the-scenes work that makes these projects possible.
Don’t forget to save this post to reference during your next renovation!


