Powder Room Remodel Reveal
/Dark, Moody, and Oh-So-Dramatic Half-Bathroom Makeover
Looking for a dramatic before and after reveal? Then you’re in the right place! Dive into this post to see how I took my powder room from boring and outdated to dramatic and sophisticated.
It’s here! It’s here! We’ve reached the end of the One Room Challenge, and I’m TIRED, but so happy!
I completely forgot how much work it is to gut and put an entire room back together over an 8-week period. I guess after last year’s reveal, the memories of stressing over each week’s deadline and all the long nights working faded away almost immediately. It just feels so dang good when I get to share the finished product!
Of course, before we get into the reveal of this space, let’s take a look at the room before I got my hands on it.
As an Amazon Associate and partner with other brands, I earn from qualifying purchases. This post may contain affiliate links, meaning I receive commissions for purchases made through those links at no cost to you.
The Powder Room Before
There was literally nothing in this room that I wanted to keep. From the crown molding down to the dated tile - it all had to go. So I got rid of EVERYTHING and turned it into…
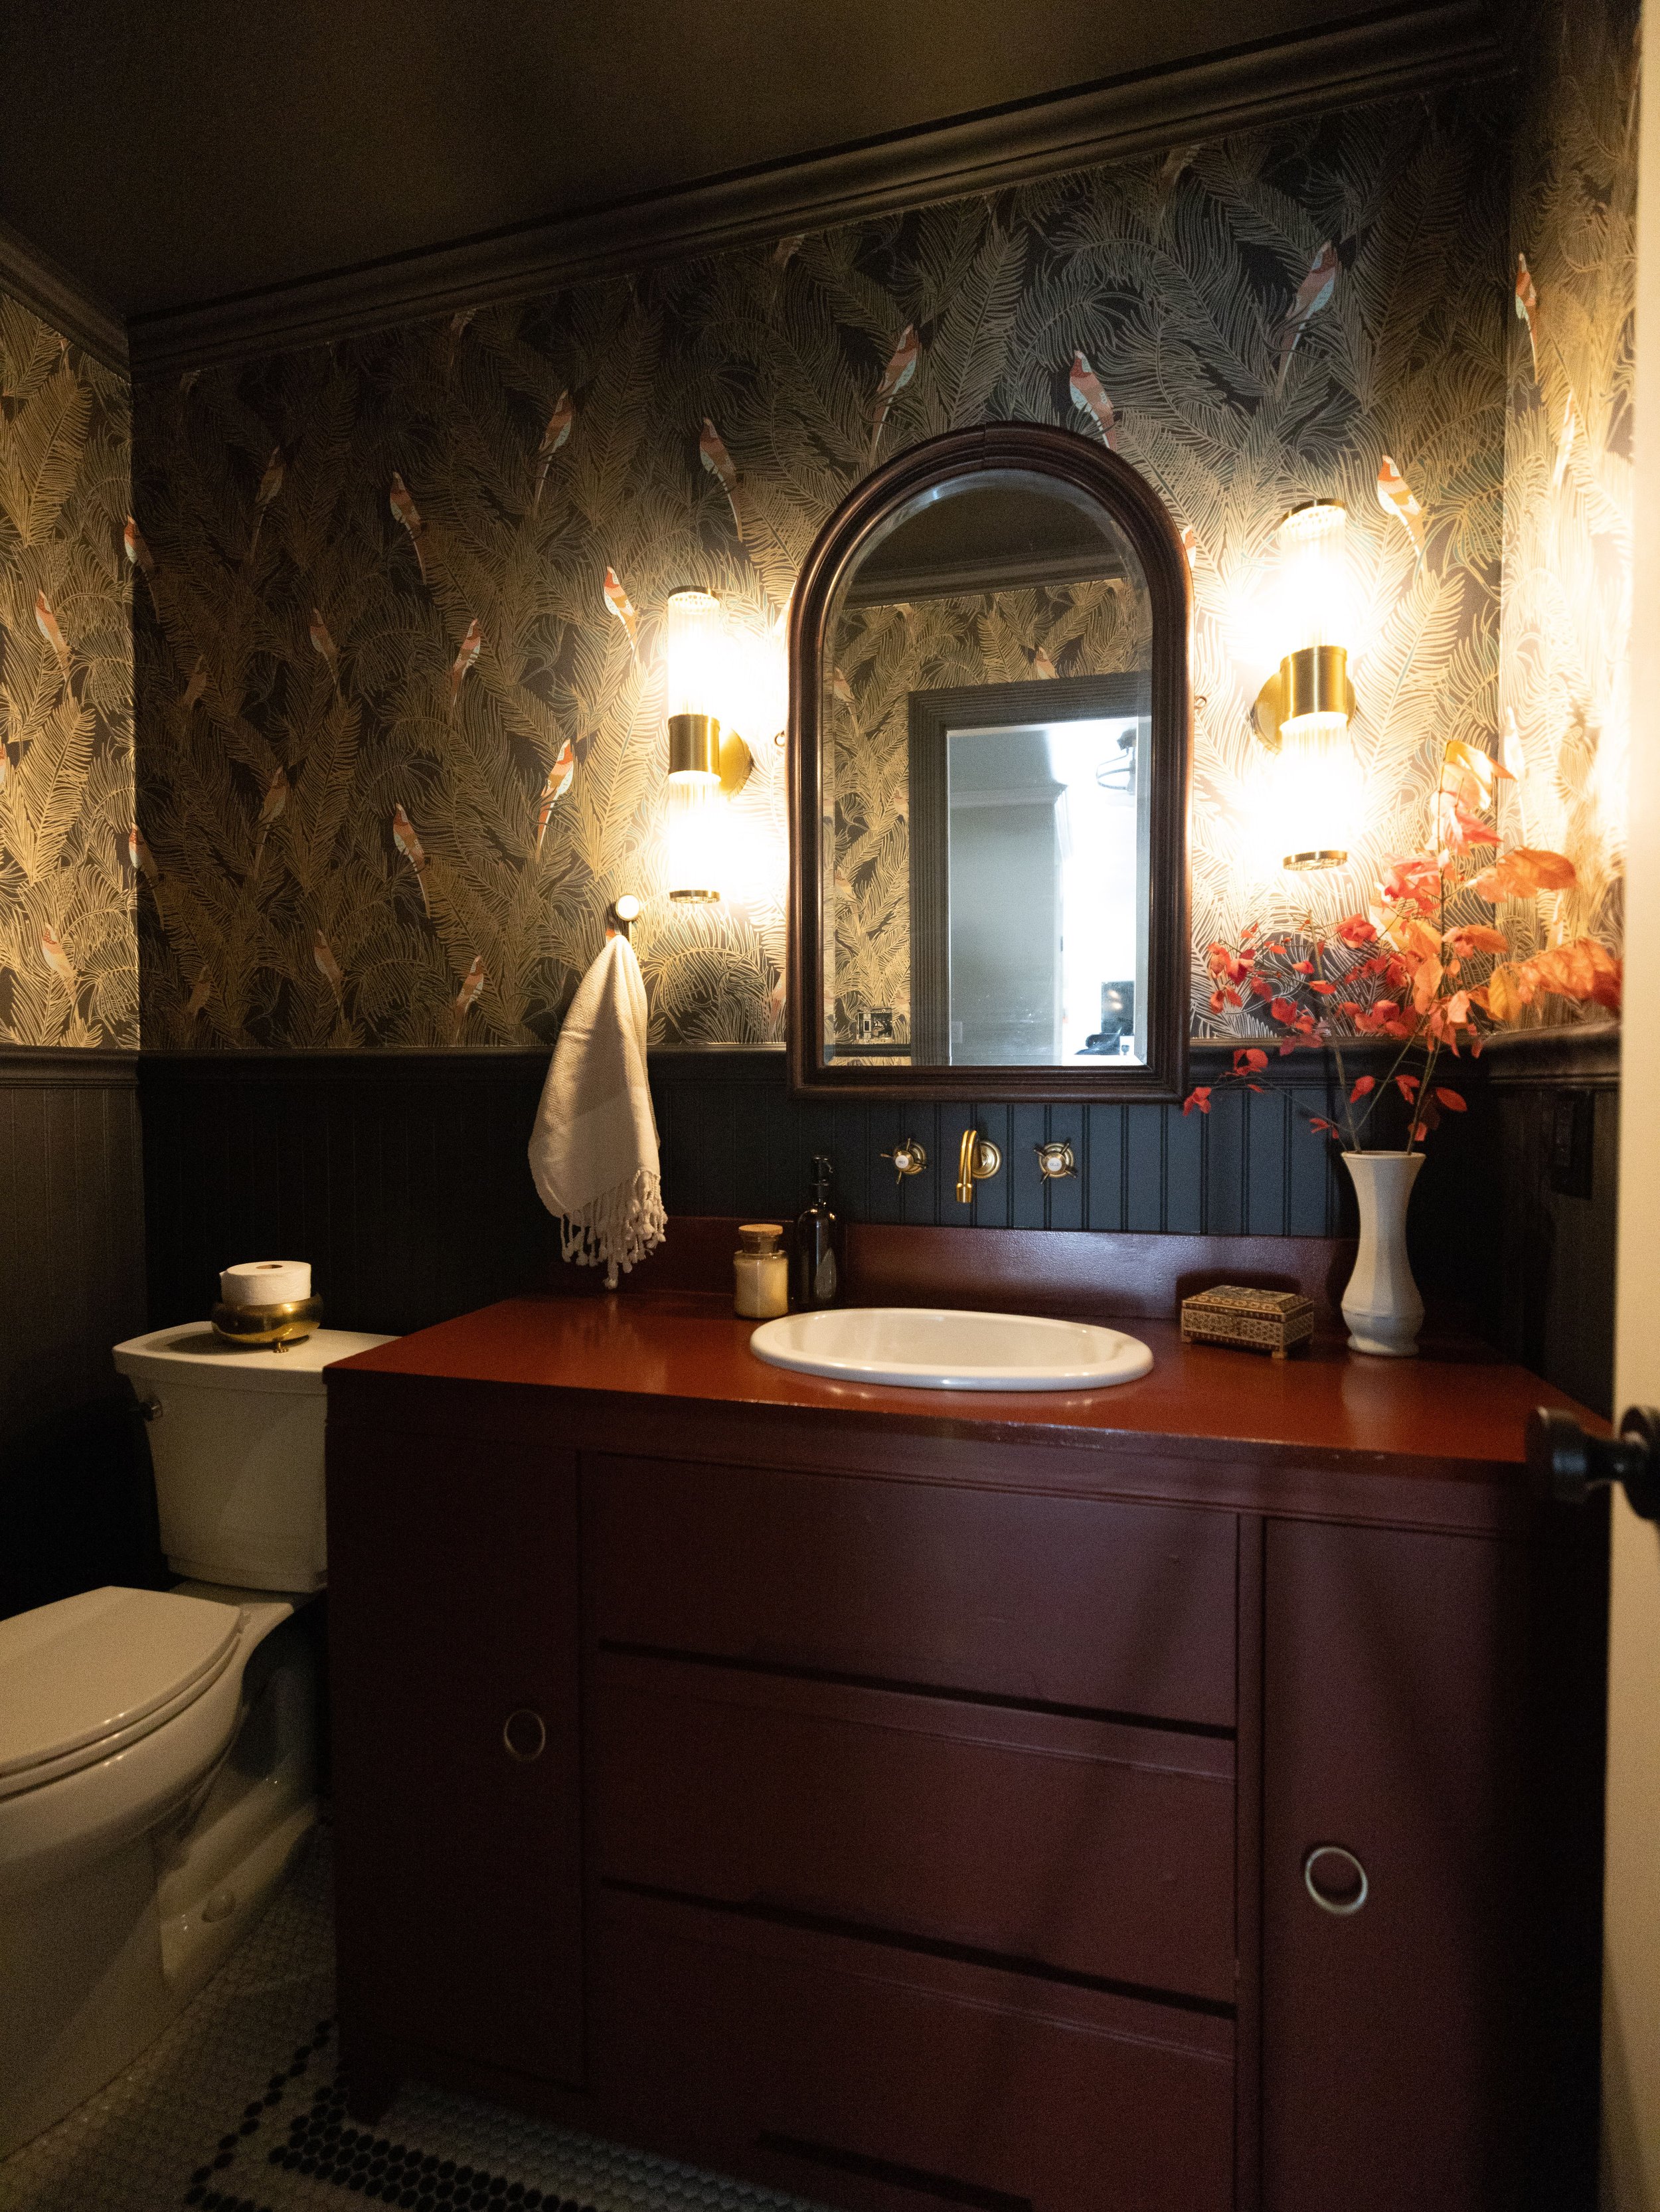
The Powder Room After
…this.
She’s dark. She’s moody. She’s oh-so-dramatic. And I’m in love!
It took a lot of work to get here, but I couldn’t be more proud of this space. This was the first time I’ve ever let myself stop worrying about the resale value of our house and let my creativity reign supreme. I think it paid off in the best way.
Now let’s get into the details because I can’t wait to show you around!
*Quick FYI - I linked as much as I could below each picture, but some items are vintage, thrifted, or no longer sold. Anything with an asterisk indicates the link is for a similar item.
Paint It Black
Most people assume that a small room should be painted a light color to make it feel larger, but I vehemently disagree. While this room is large for a half-bathroom, it’s still a small space (less than 5x7 feet). So what did I do?
I painted it black!
The key to painting small rooms a dark color is eliminating harsh color transitions. By painting the beadboard, door, trim, and ceiling all the same color your eye doesn’t notice the break between, for example, a dark wall and white ceiling. Instead, it all blends together and actually makes the room look and feel larger.
For this room, I chose Onyx by Pittsburgh Paints. I love that it’s a softer shade of black with some brown undertones, which pair perfectly with the wallpaper.
Add Eye-Catching Wallpaper
Speaking of the wallpaper… I’m in LOVE.
This wallpaper takes my breath away. I love the organic feel of the leaves with the subtle green and metallic gold outline. I especially love the pops of color in the birds.
From the beginning, I was certain I wanted the vanity to be green. (I was inspired by this one.} But once I started testing colors, I was shocked that green no longer felt right. Instead, I was drawn to the warm red tones of the birds in the wallpaper.
I don’t typically like red, but I went with my gut and, well, I’d say it was worth it…
The color is Rustic Red by Sherwin Williams. I was a little nervous at first because it was much brighter when I was painting it in the mudroom. However, in this darker space, it adds so much drama and depth. As much as I love green, I have to admit that it wouldn’t have had nearly the same impact.
Not only was installing penny tile a really fun DIY, but it added so much character and sophistication to this room!
Light It Up
Moving on up the walls… can we talk about the sconces for a hot second?
I’ve been fawning over these sconces for quite a while, so I was ecstatic when I found a place to use them! I’m really drawn to the vintage look with the brass and ribbed glass, and I think they fit right into the overall feel of this bathroom.
Something Old, Something New
While we’re talking about vintage, there are several actual vintage items used throughout this space. In fact, most of the decor is thrifted, like this awesome brass bowl with feet that fits a roll of toilet paper perfectly.
It’s seriously the happiest little accident! (I found a couple of similar pieces here, and this one comes in a set of two!)
The box on the vanity was also a thrifted find ( this one is similar), and I thrifted the vase and painted it when I did this project a while back. Here and here are a couple other vases that caught my eye.
I stole the branches from a Burning Bush in my backyard, but now I’m on the hunt for a look-a-like faux version like this or this so I can keep the look year-round.
The mirror above the vanity is one of my favorite parts of the bathroom because it’s actually from our Charlie Foursquare house! The arch, the details in the wood, and the slight bevel of the glass are perfect.
(This mirror has a similar look, but I'm especially fond of the shape and details of this one.)
It’s the perfect weird addition to this room, don’t you think!? I’m so happy I found a place for it!
(Visit this post if you’re stumped on how to source vintage picture frames!)
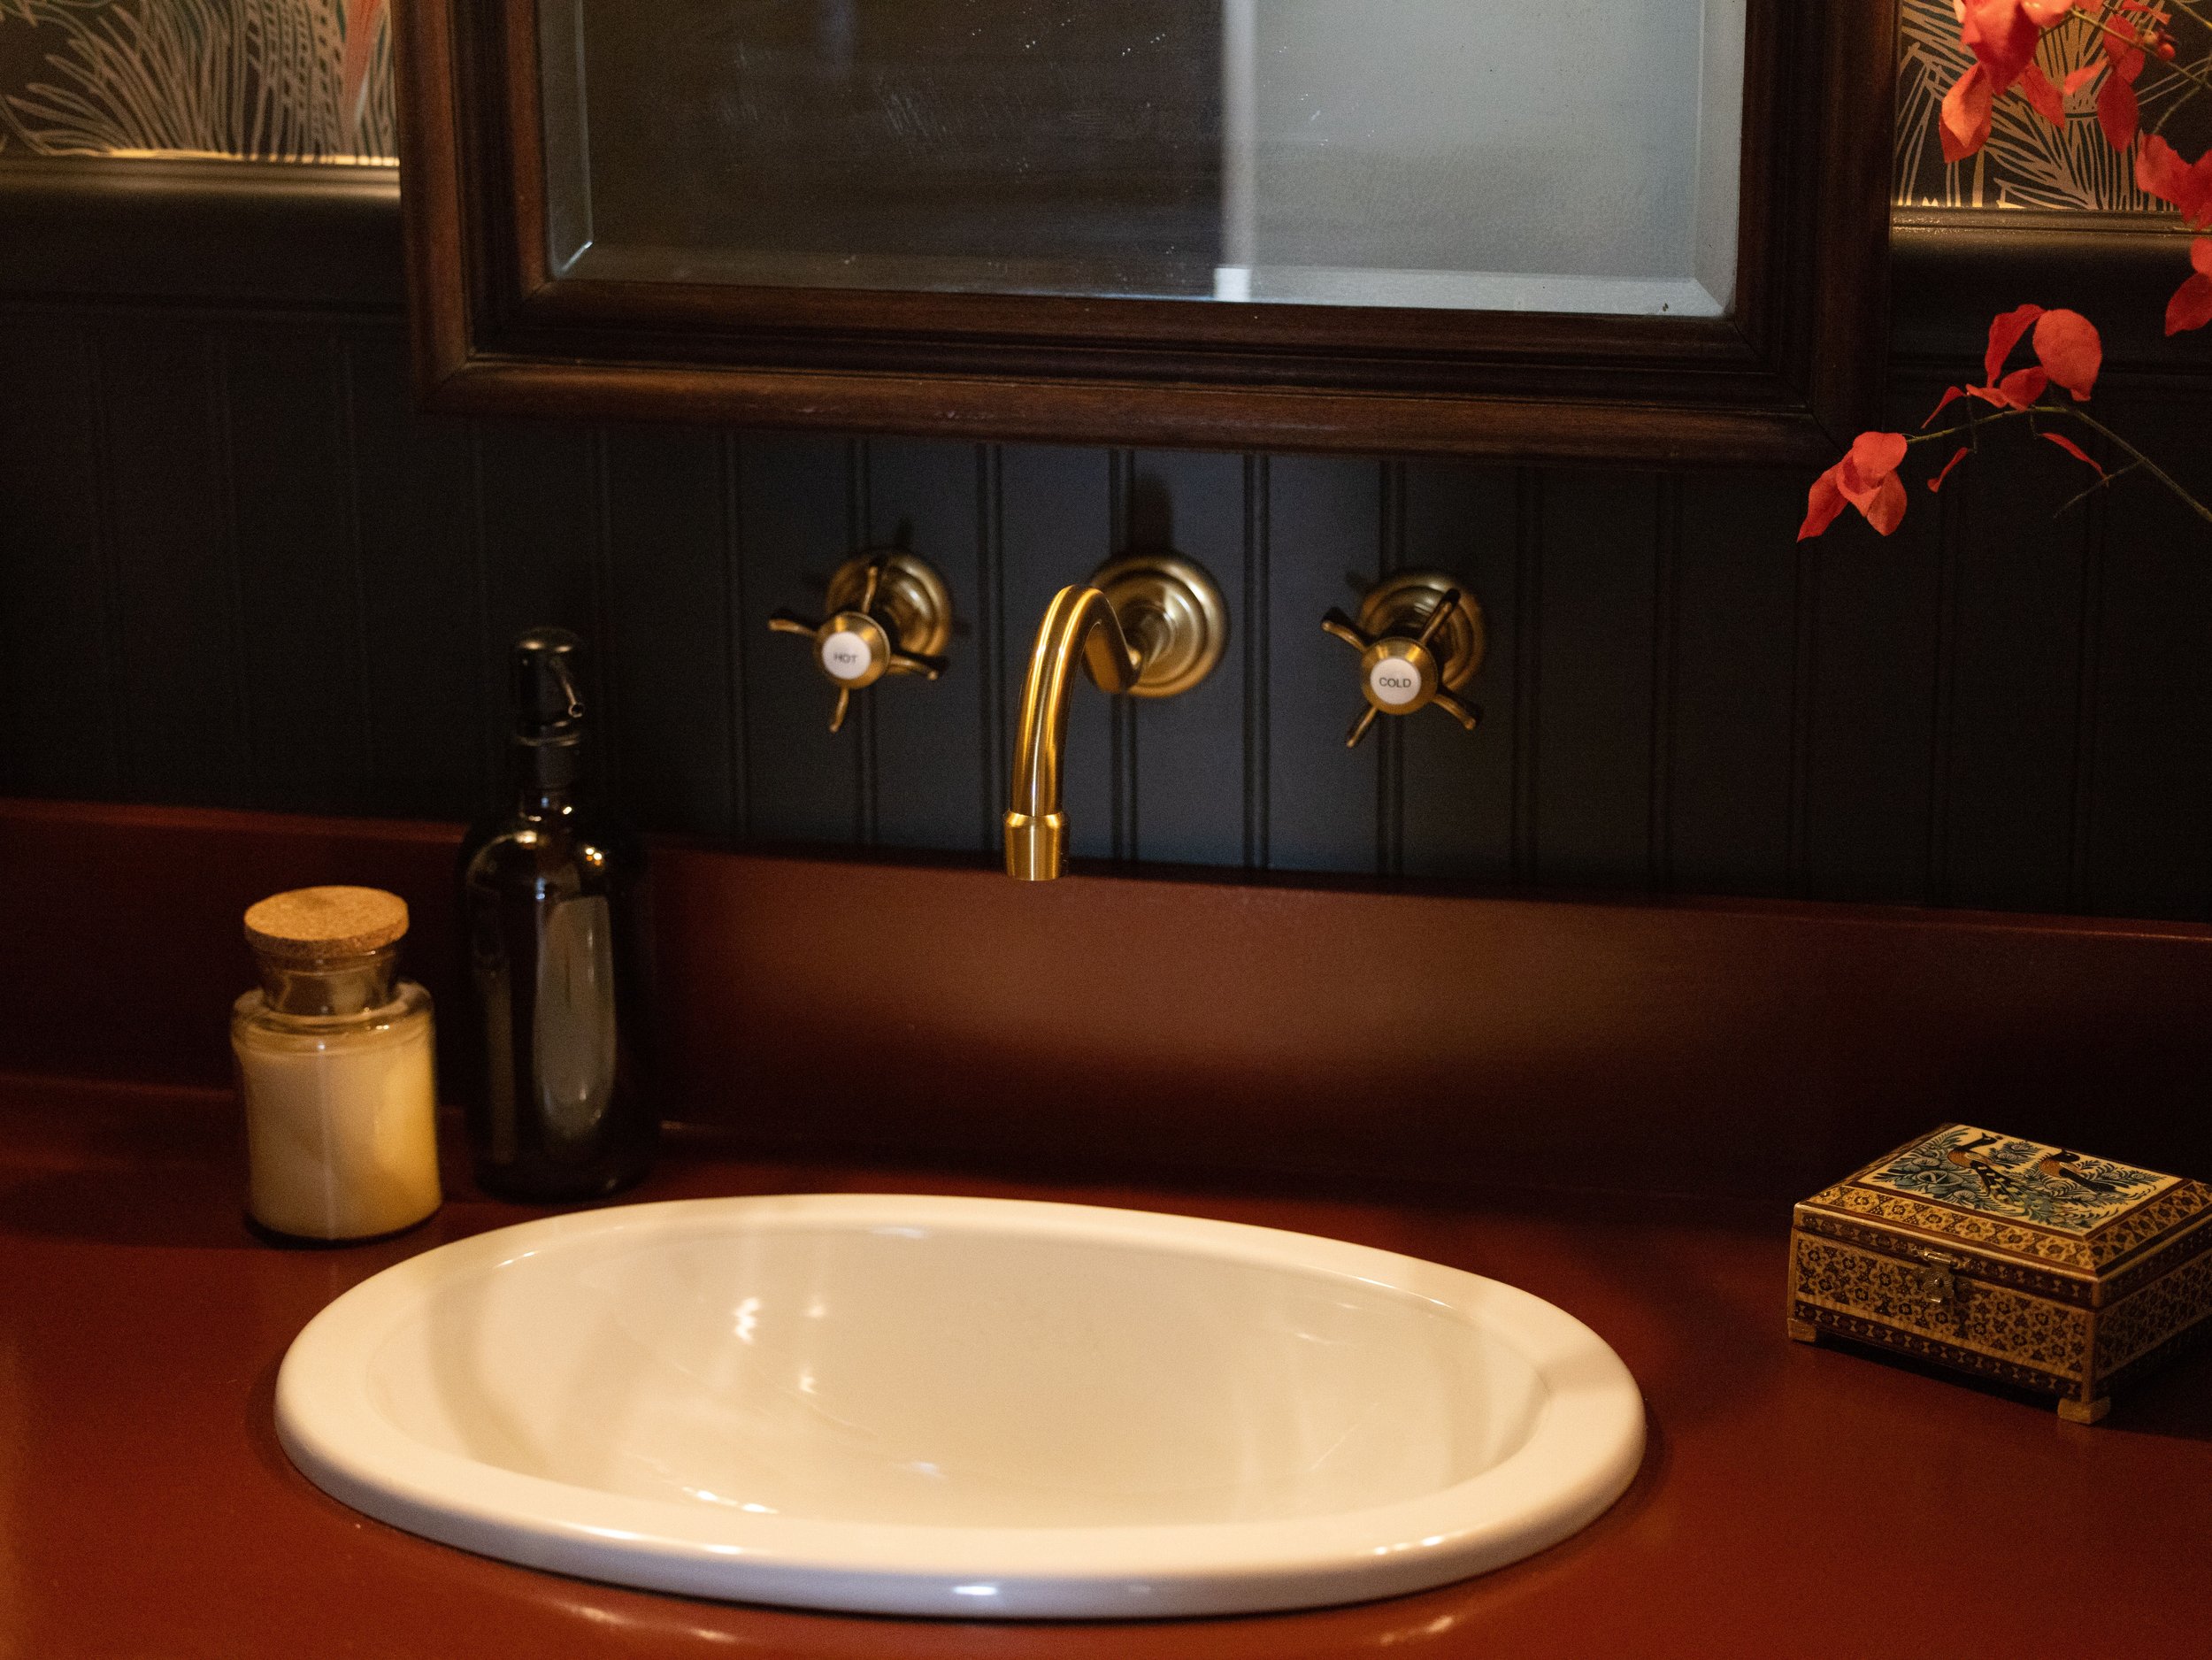
Lastly, I can’t forget to call out the wall-mounted faucet because it’s simply gorgeous.
Not only do I love the look, but I’m pleasantly surprised by how heavy and solid it is. I can’t wait to actually use it!
Oh yeah… we still have to hook up the drain line for the sink, ha! Soon!
Final Thoughts
I’m giddy with excitement over how this bathroom turned out, and so, so proud that I made it happen from start to finish. I had so much fun pushing the boundaries with this design. I can’t wait to do it again in the next room!
What do you think of this space? Let me know in the comments!


