How To Limewash Your Brick House
How I Limewashed our Flip
If you’ve read some of my previous posts, you may have come across the post where I wrote about the flip that we bought. In that post, I talked about painting our little brick flip house white. Well, I’m excited to say that now it IS white! But I didn’t end up painting it - I limewashed it!

What is limewash?
You may be asking yourself, “What the heck is limewash!?” Well, I’m here to fill you in!
At a high level, limewash is essentially crushed limestone that is combined with water to make a wash. It’s a method that’s been around for centuries. When applied to a porous surface (like brick), it creates a chalky, matte finish. In the picture above I’ve only applied one coat, but you can apply multiple coats for a more opaque finish.
How is that different from whitewash?
There are actually lots of differences between limewash and whitewash. Allow me to break it down for you.
Going Green: First of all, limewash is environmentally friendly. In fact, it’s also mold-resistant, so once applied you shouldn’t have to worry about power washing that green fungus off the side of your house! On the flip side, whitewash is made with diluted water-based paint, which is pretty chemically and not so great for the environment.
Permeability: Limewash penetrates the brick, which means it won’t peel with time whereas paint never truly soaks in and can peel and flake after a couple of years. Limewash will erode eventually, but it takes much longer and can actually end up making the brick look antique and even better. But if you don’t like how it looks once the limewash starts to wear off, you can always apply more on top.
COST!: The ingredients for limewash are incredibly inexpensive. One 50-lb bag of hydrated lime cost us around $8. The only other ingredient is water.
Color: Limewash really only comes in one color - white. You can add pigment, but I didn’t explore that option for our house and didn’t see a lot of “how to’s” out there so I’m not sure how tricky it is. Whitewash on the other hand can technically be done with any color of paint.
Safety: Limewash is highly caustic and will burn you if it touches your bare skin. Paint on the other hand is… paint. No big deal.
Why did we choose limewashing over whitewashing?
Obviously, there are pros and cons to both limewashing and whitewashing. But how do you choose one method over the other? I think it’s really up to personal opinion. After hours of research, there were several big reasons that pushed me to give limewashing a try.
I knew I wanted the brick to be white, so color wasn’t an issue.
I really like the matte finish of limewashing. However, it’s worth noting that you can get a matte finish if you were to use flat paint for whitewashing.
I had never tried this method before, so it was definitely intriguing to try something new.
COST! Since this is a flip, we’re always focused on the budget. But even if it were my own house it’s just my nature to be sensitive to how much things cost.
And the biggest factor: permeability. Knowing that the limewash would stay on the surface of the brick for longer, and may even look better over time, was a big plus. Even though I won’t be living in this house, I want to do right by the person who eventually buys it, so the option with the proven longer-lasting result felt like the right way to go.
How did you do it?
Ah yes, the the fun part, where I give you a step-by-step first-hand experience as to how I limewashed our house! Here’s what you’ll need to get your limewashing on -
Materials

As an Amazon Associate I earn from qualifying purchases. This post may contain affiliate links, meaning I receive commissions for purchases made through those links, at no cost to you.
- Hydrated lime
- Large paintbrush (mine was 4 inches)
- 5-gallon bucket
- Hose w/ spray nozzle
- Gloves
- Long sleeves
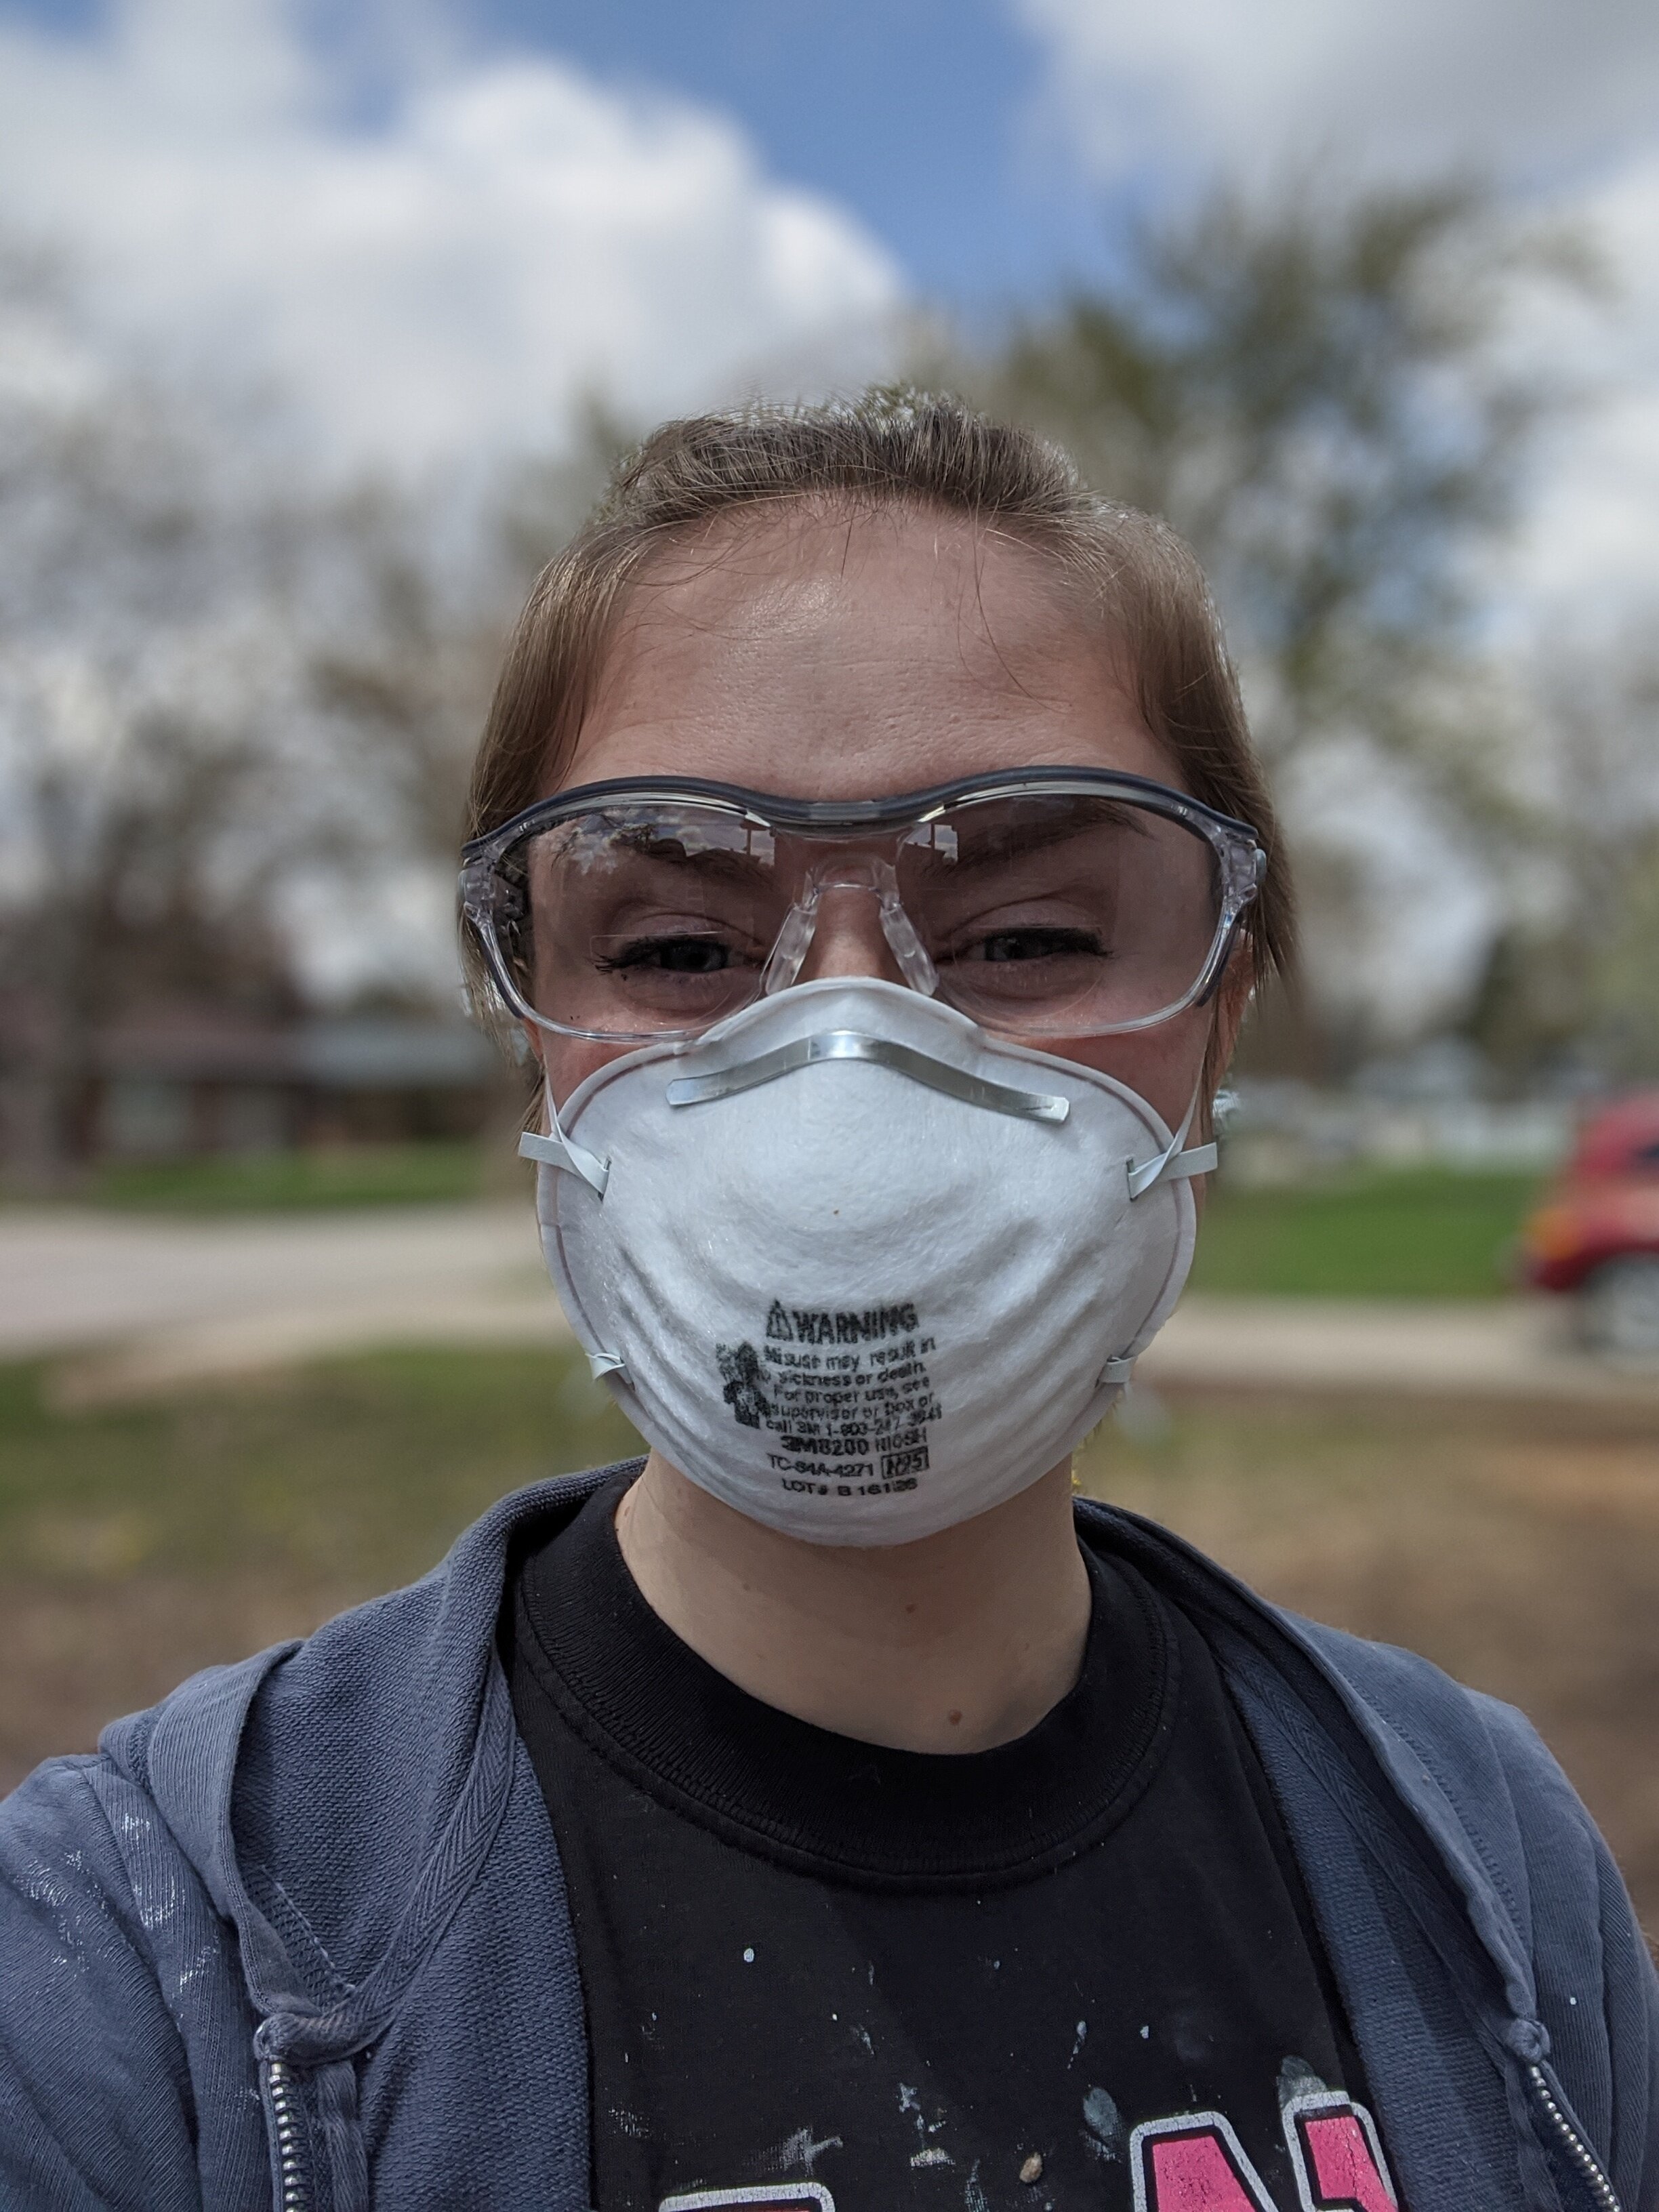
- Mask
- Safety goggles
- Long stir stick or drill with mixing paddle
- Nice weather - I know this isn’t really a “material”, but it’s super important for a nice finished product! Avoid weather that is too cold or too hot. You should also try to avoid applying your wash in direct sunlight (especially on hot days) as it can dry out too fast, or on overly humid days (which will slow down the drying process).
Step 1 - Preparation

When preparing to do any finish on the exterior of a home it’s important to get rid of any grime or dirt that could cause a barrier between your exterior surface and your paint/wash. Several days before I limewashed the house, Lucius took some time to power wash the exterior to get it so fresh and so clean, clean.
It would have been smart to remove the shutters before the power washing but, meh. You live, you learn (and now you have Alanis Morissette stuck in your head). Above is my father-in-law helping me with a tricky screw on the shutters before I got started limewashing.
Step 2 - Mixing your wash

The main ingredient for this project is hydrated lime. Everything I read makes it sound like this is available at any hardware store, but in my experience, it was crazy hard to find! I was thisclose to buying a bag off Amazon for a lot more when we finally found a store that carried the brand above.
When I say this project is cheap, I mean it. The entire 50 lb bag cost us less than $8! And although only the front facade of our house is brick, we barely made a dent in the bag.
As previously mentioned, lime is really caustic. The hydrated lime comes in a fine powder that gets EVERYWHERE so before you start mixing your wash cover yourself up! Throw on some pants, long sleeves, gloves, goggles, and a mask.
I don’t know why i felt the need to smile in this picture.
To mix your wash you need an 80/20 ratio - 80% water, 20% hydrated lime. I poured water and the hydrated lime in the correct proportions into a 5-gallon bucket until it was pretty full, then took my drill with the mixing paddle and mixed it up.
If you’re limewashing a whole house, several of the sources that I read talked about how it’s worthwhile to mix all your wash at once in a wheelbarrow so you have a consistent batch. You can mix batches as needed, but you run the risk of one batch being more opaque or transparent than the next. Since our house is small and only the front is brick, I didn’t think I’d need more than one small batch.
I don’t know why but I was anticipating it to be MUCH more difficult to mix. It was actually very easy and could be done with a long stir stick if needed. The most commonly used comparison I found when researching this process was that your final product should be the consistency of whole milk.
Step 3- Application
Changing the exterior of your house is pretty terrifying, especially with a process you’ve never done first-hand and that isn’t easily reversible if you dislike the end product. But let me tell you that limewash is insanely easy to apply!
To begin, wet the brick down with your hose. I recommend wetting it down in sections as you work your way around the house so it doesn’t dry before you get to it. Then, start at the top and work your way down in sections.
You can apply your limewash liberally, just take care not to drip a ton on any concrete or porous surfaces below that you don’t want limewashed. Depending on the look you’re going for, it’s not necessary to get in every nook and cranny.
Below is a quick little video I shot as I was applying the wash so you can see first-hand how easy this is.
As you can see, I wasn’t shy about loading up my brush and just slapping it on. I did try to avoid big drips on the lower bricks because I didn’t want them to dry before I could smooth them out, but even the inevitable drip here and there ended up being a nonissue.
Something good to know ahead of time - the wash goes on very transparent. Don’t let this scare you! I only did one coat on the whole house and as you can see in the picture below, as the wash dries it gets more opaque.

In fact, you can do multiple coats of the wash to create a completely opaque look.
This project is not only inexpensive and easy, but it’s pretty fast! Because you don’t have to be super precise with your wash (and if you’re going for an uneven look it’s even less important to apply wash to every square inch), this project only took me around 3 hours! Granted, only the front of our house is brick, an entirely brick house could be limewashed in a day or two, especially if multiple people were taking part in the limewashing party.
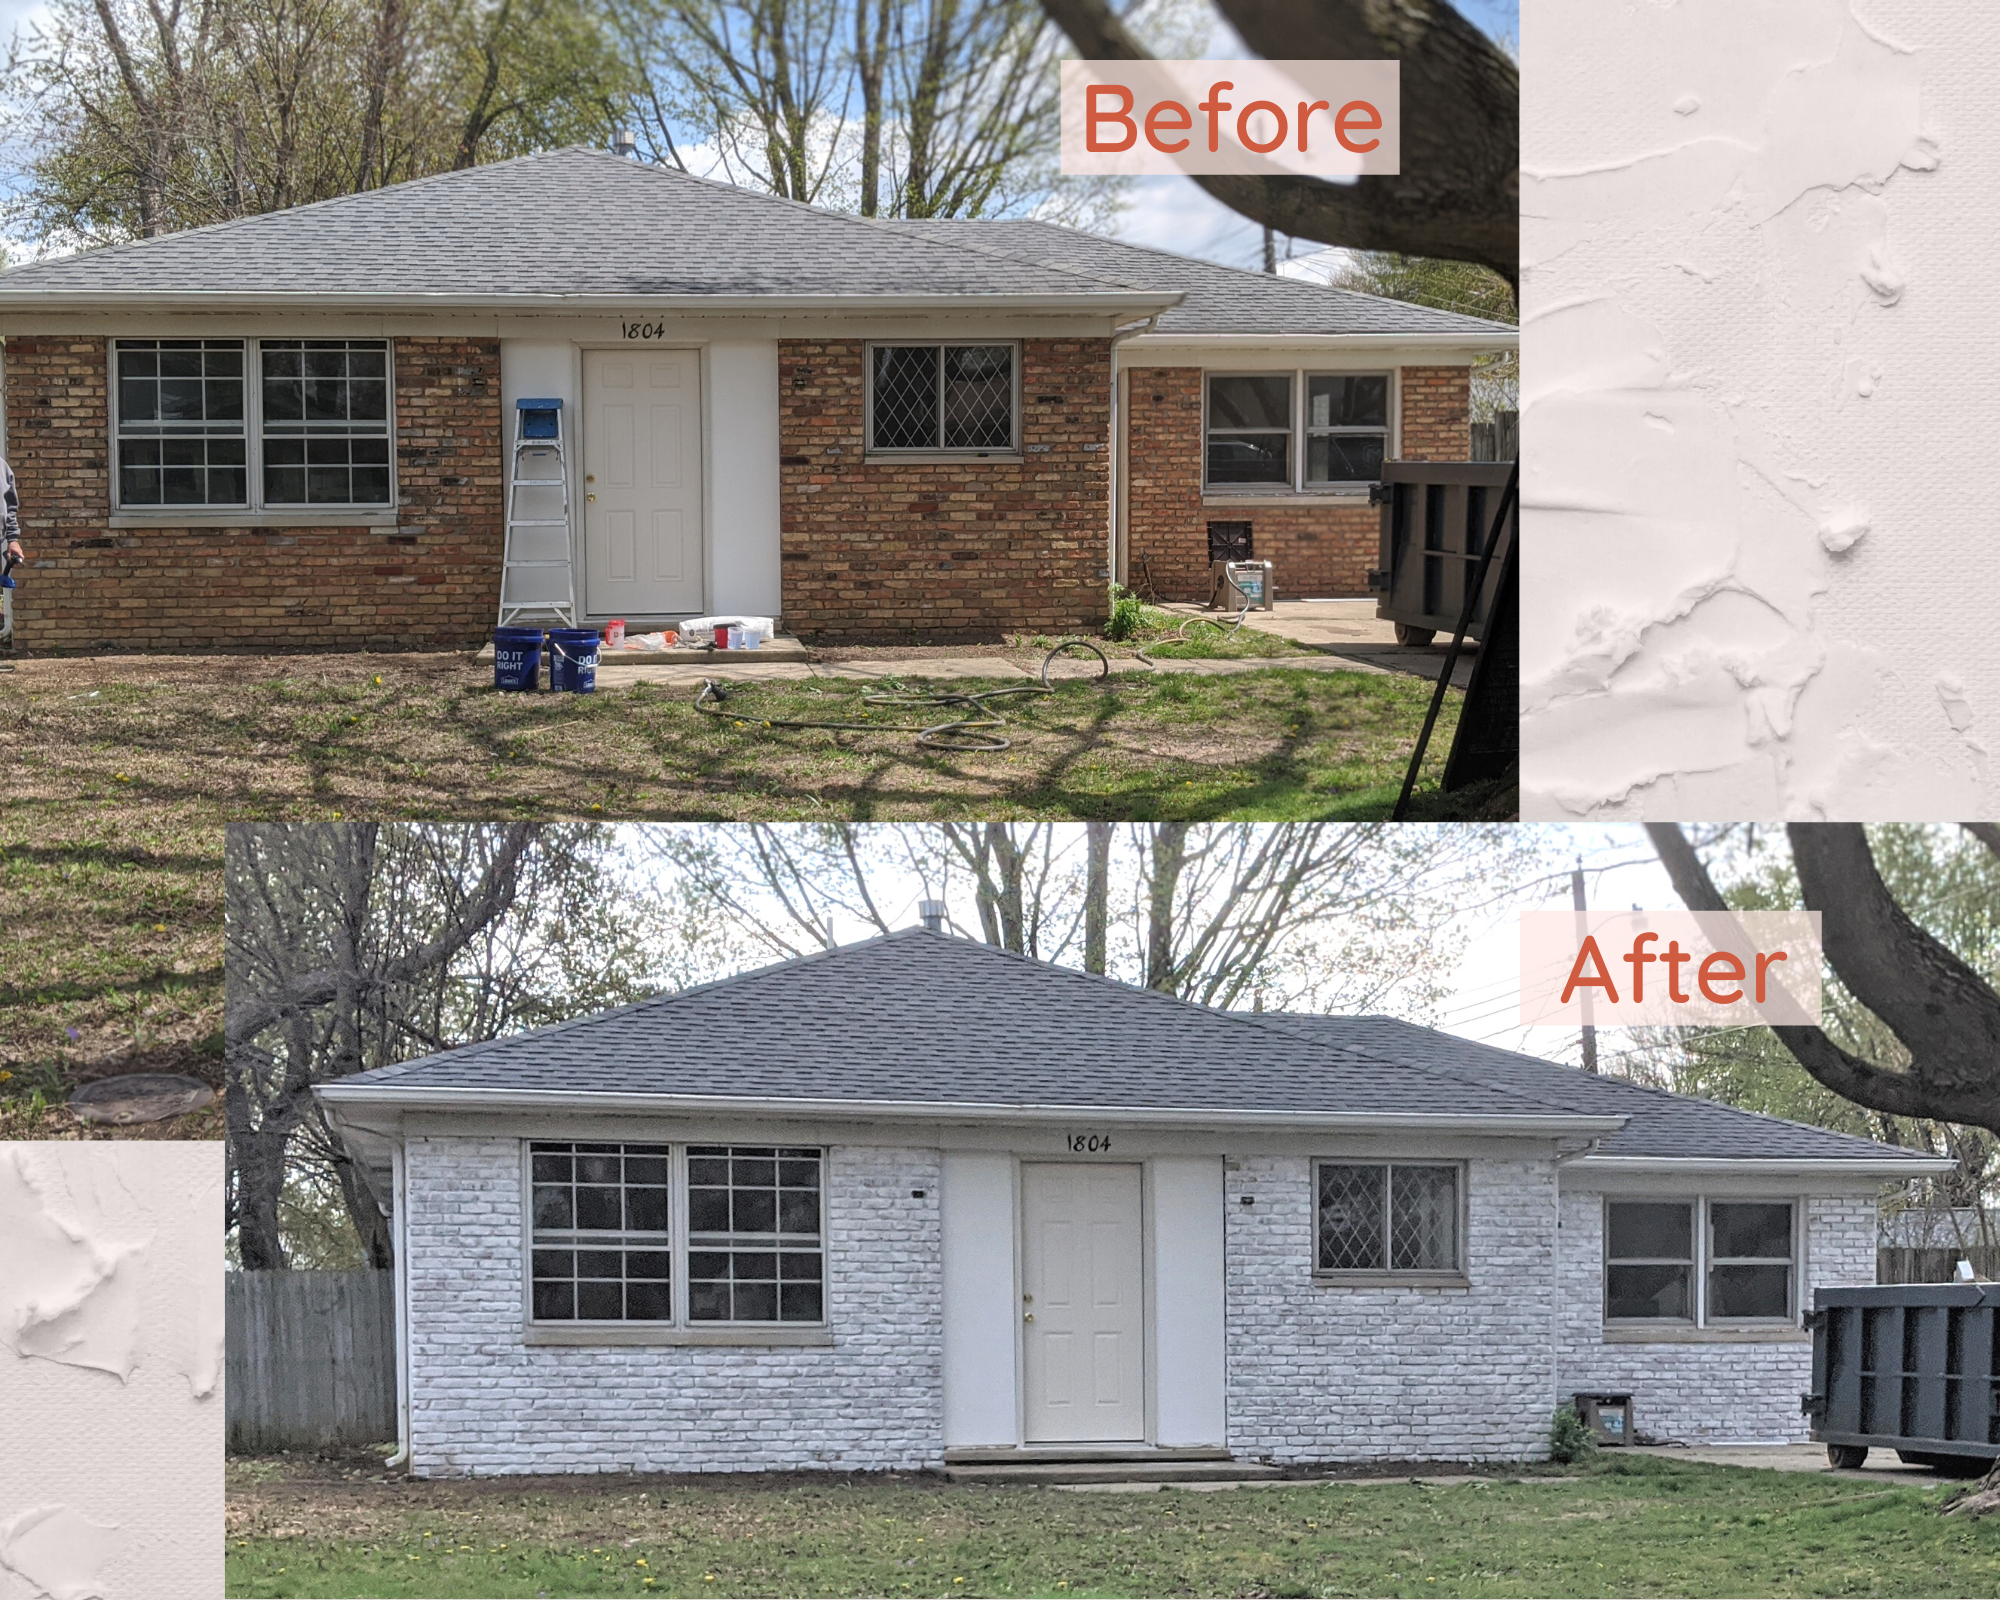
Admittedly, the house is looking pretty monotone right now, but have no fear! I’m deep in the brainstorming process of adding some pops of color and landscaping, which this house desperately needs.
We hope to finish up this flip in the next few weeks and I most definitely plan on sharing lots of photos when it’s all complete. Keep checking in so you can check out the final product!