3 Ways to Remove Stubborn Wallpaper
How to Easily Strip Wallpaper - Fall ‘23 ORC Week 2
I've owned three houses in my lifetime, and I've removed wallpaper in each of them using a variety of methods. In this post, I'm sharing three ways to remove wallpaper - including my favorite way!
All the houses I've owned have been older, i.e. before removable wallpaper was popular. Therefore, I've never had the luxury of simply peeling it off the wall and moving on with my day. As I learned during week 1 of the One Room Challenge, my half-bathroom was no exception.
What's The One Room Challenge?
The One Room Challenge is a celebration of creativity, inspiration, and original ideas where creators encourage and motivate one another as they transform a room over a period of 8 weeks. I’ll be sharing a new post with my progress each Wednesday until the final reveal on November 15, 2024!
Where We Started…
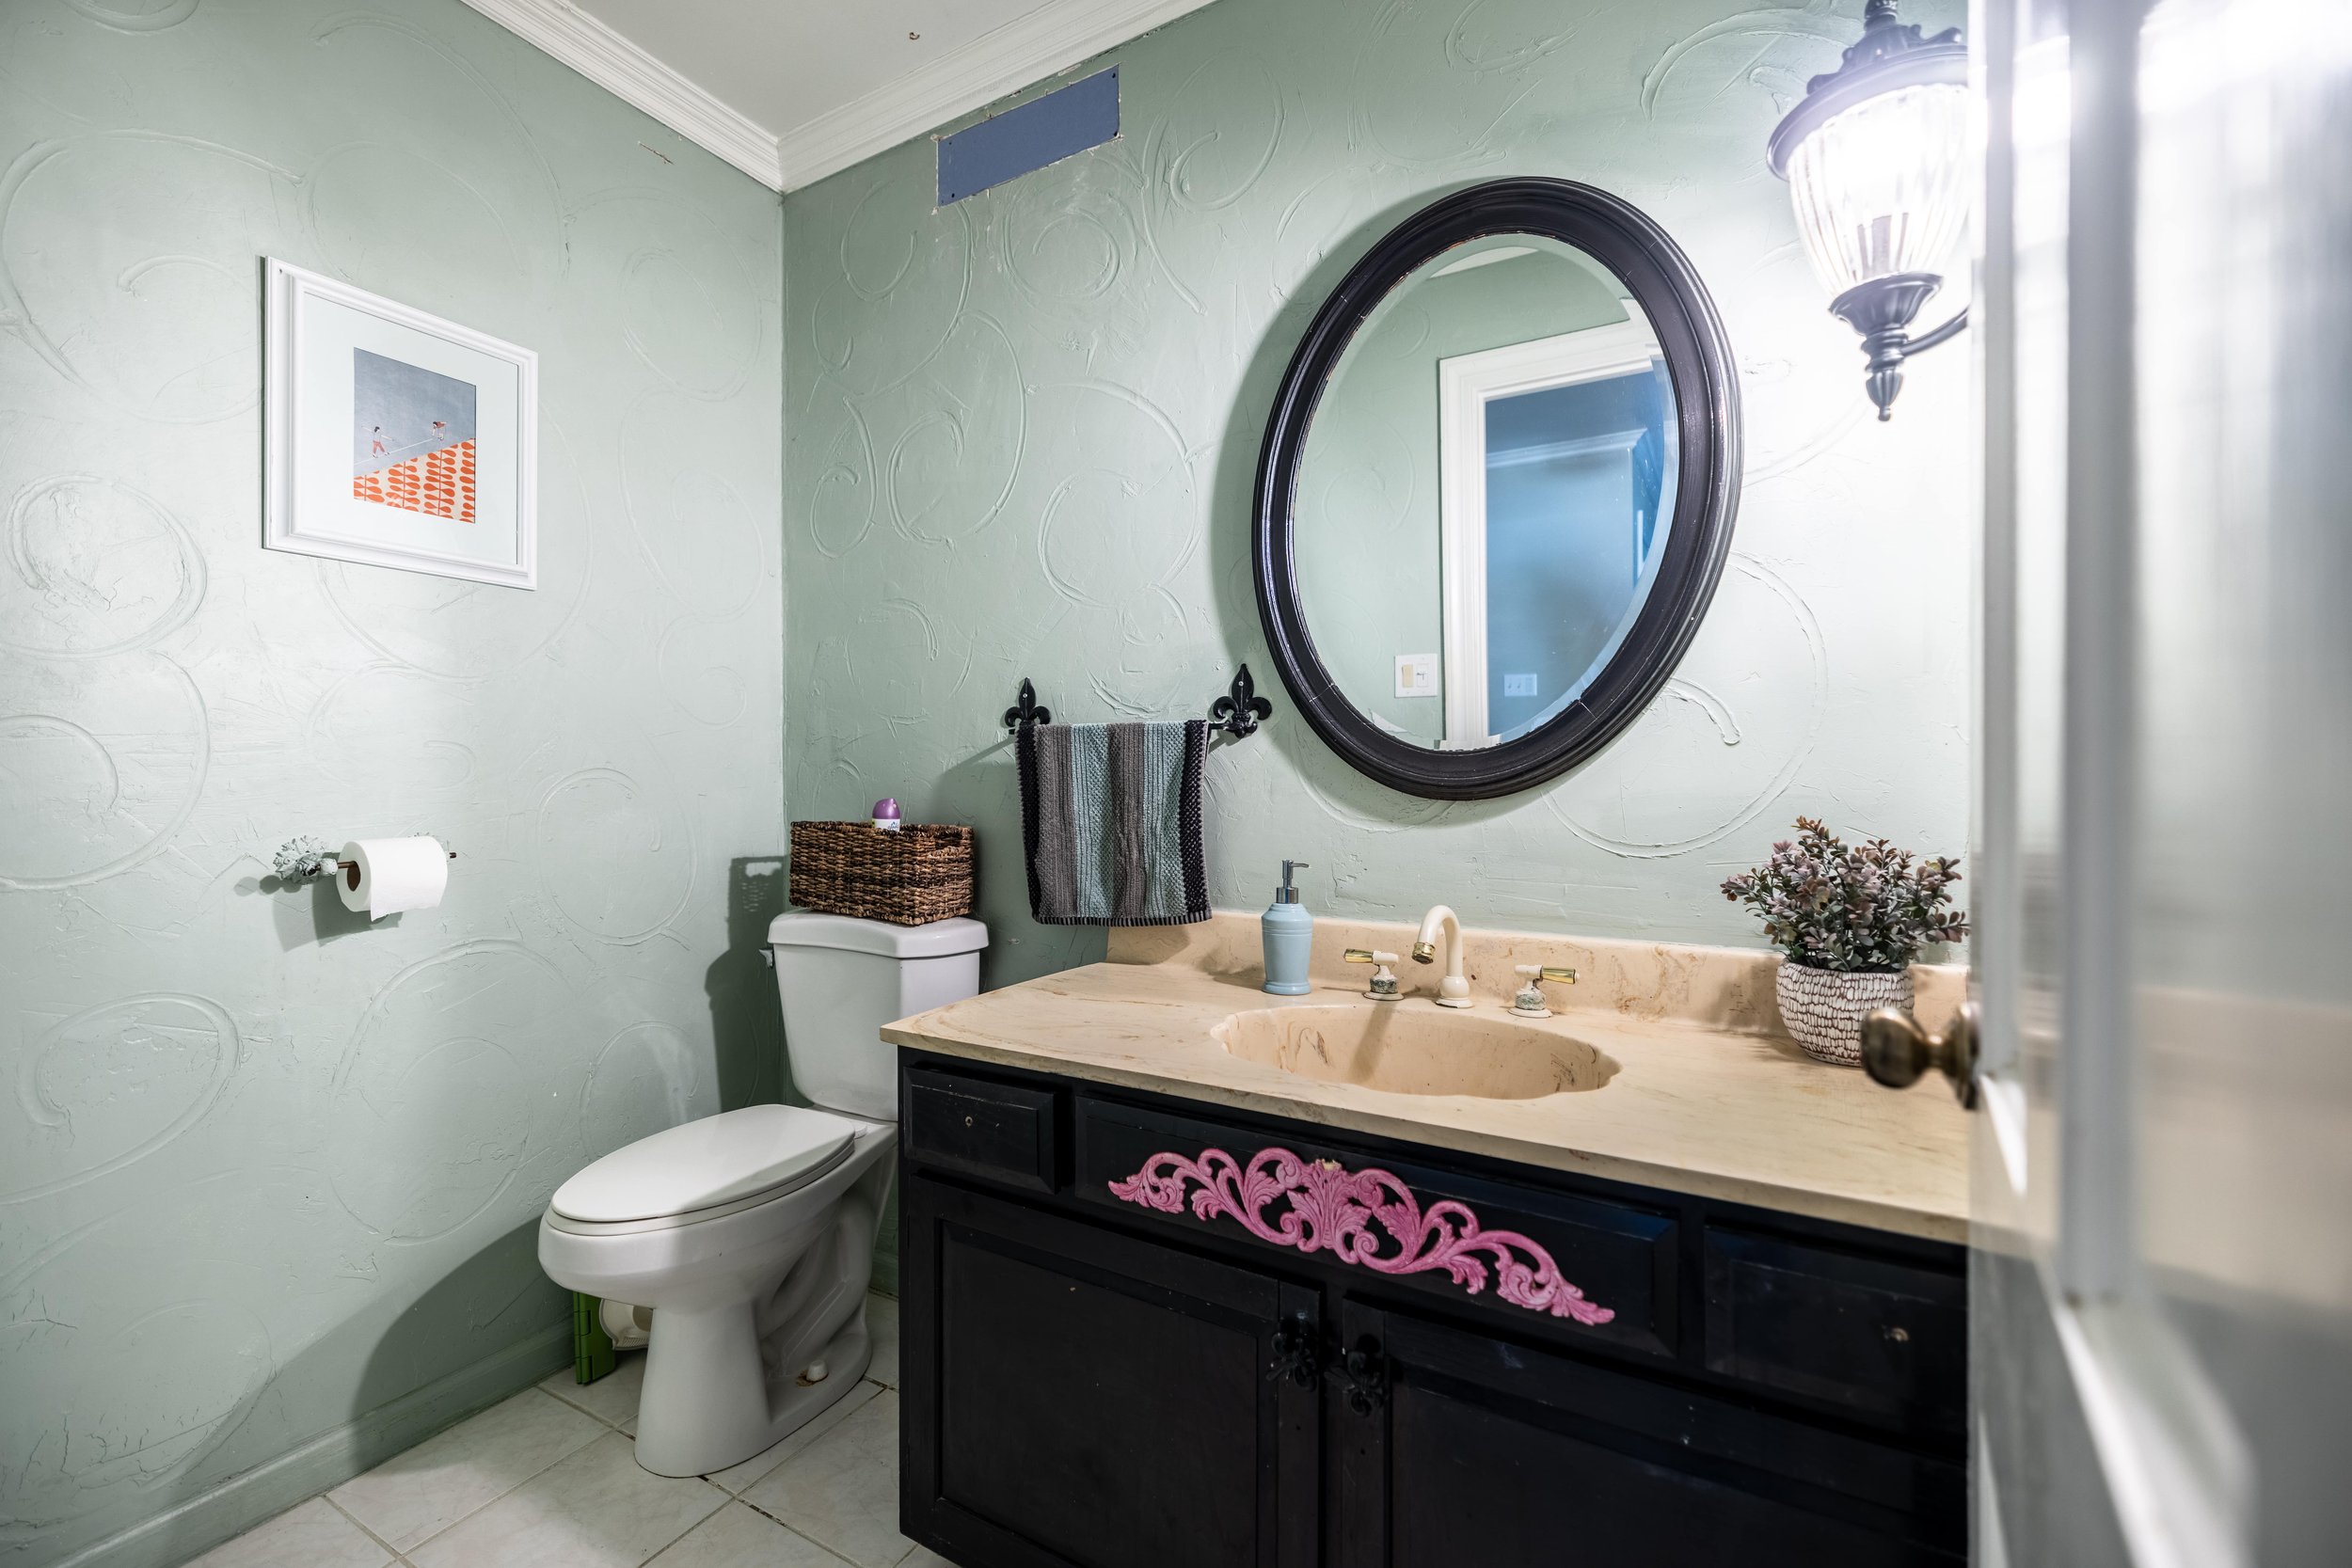
In last week’s post, I shared the current state of the half-bathroom and mentioned the weird wall texture that was on top of wallpaper. Here’s a reminder:
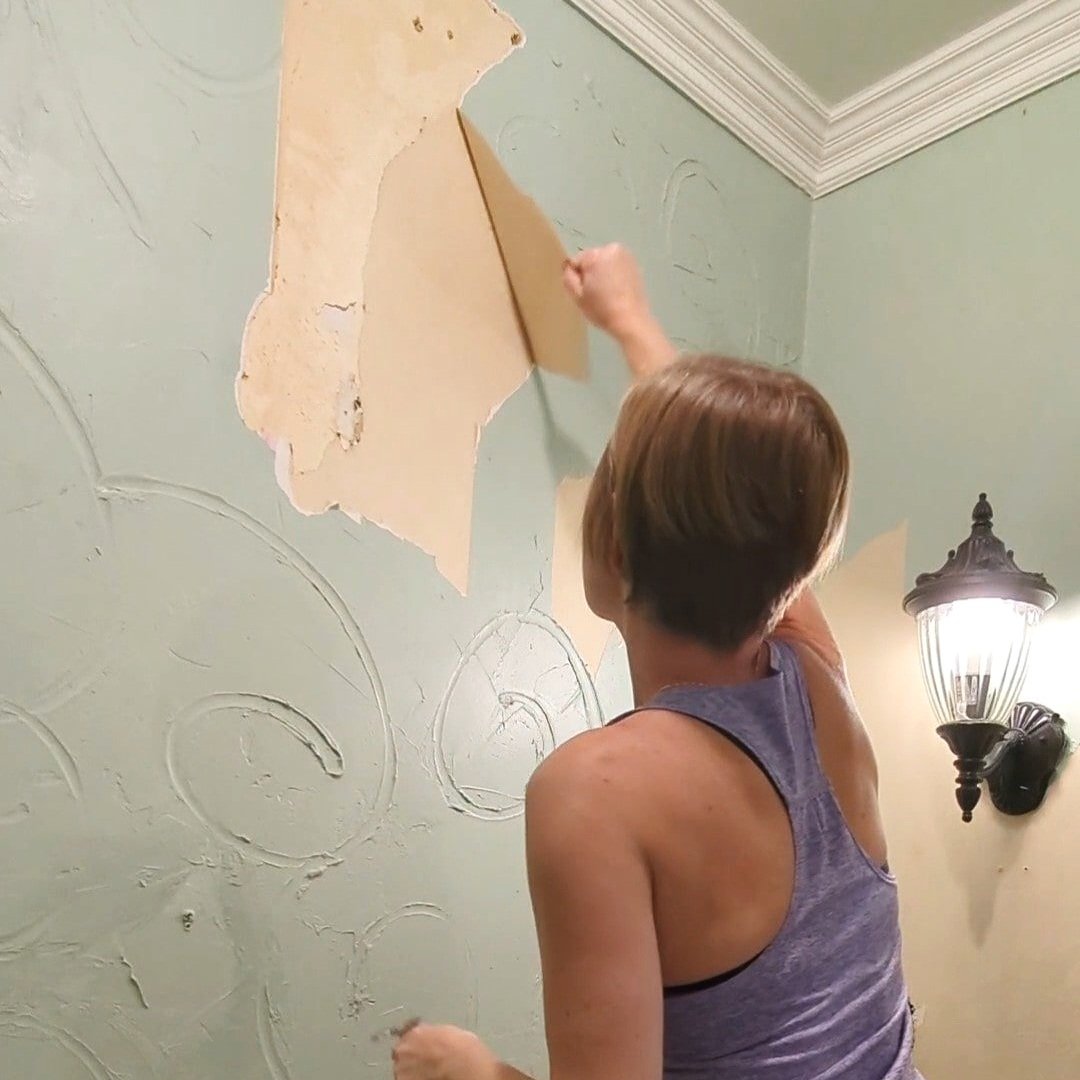
What I didn’t realize at the time was that the texture was actually on top of TWO layers of wallpaper.
I initially thought I would have to gut the entire room because of the wall texture. Much to my surprise, the wallpaper actually worked out in my favor because it allowed me to peel the texture right off with the top layer! However, there was still a considerable amount of wallpaper backing left to deal with.
Below, I’m sharing how I removed my wallpaper, as well as some other methods you can try.
Quick note: Before you try any of the methods below, if there's even a slight possibility that your wallpaper is removable, try simply pulling at a loose corner to see if it comes off. If so, consider yourself lucky!
If not… you've come to the right place. Keep reading!
As an Amazon Associate, I earn from qualifying purchases. This post may contain affiliate links, meaning I receive commissions for purchases made through those links at no cost to you.
Materials Needed*
- Plastic Dropcloth
- Painters Tape
- Trash Bags
- Wallpaper Scraper, Putty Knife (or my favorite: 5-in-1 Tool)
- Wallpaper Scorer
- *Additional materials needed for each method are listed within those sections
Step 1: Clear the Room & Protect the Floors
Start by moving everything away from the walls and give yourself plenty of room to move around. For me, this meant removing everything from the room since I’m not keeping any of it anyway!
Next, remove the outlet covers and put painters tape over the outlets.
Lastly, wallpaper is sticky. If you like your floors, throw down a dropcloth so your discarded wallpaper doesn’t stick to it.
Step 2: Pry Up the Wallpaper
Find a loose edge or corner and try to peel the wallpaper off the wall. If you're lucky, it’ll come up easily (paper backing and all!). But, to be honest, it’s unlikely that it will all come off cleanly without some elbow grease, especially if the wallpaper is old.
If you're sort of lucky, you'll at least be able to peel up the top layer.
If you can't get at least the top layer up, or some sections won't come up, don’t panic!
Step 3: Use a Wallpaper Scoring Tool
If you’re struggling to get the top layer of wallpaper up, I recommend using a wallpaper scoring tool. Simply run the scorer over the wallpaper, applying enough pressure to puncture the wallpaper but not so much that you’re digging holes into the wall.
This will allow water/steam/whatever mixture you’re using to get under that top layer of wallpaper and saturate the backing so it releases from the wall.
From here, there are several ways to remove what’s left of your wallpaper, so I’m breaking them down for you below!
Step 4: Methods of Removing Wallpaper
How to Strip Wallpaper with a Steamer
As mentioned above, I’ve removed wallpaper using several methods over the years. But the one I always defer to? Using a steamer!
Wallpaper steamers are fairly inexpensive (this newer version of mine is less than $75 and comes with an extra attachment for small spaces), and they can even be rented from the hardware store. At this point, mine has paid for itself several times over!
And if you already have one, I’ve even seen people use a clothes steamer as an alternative (though I can’t speak to how effective it is).
Here’s how to remove wallpaper with a steamer:
Fill the steamer with water and let it heat up. Mine starts bubbling like a witch’s brew when it’s ready.
Hold the steamer on the wall for at least 10 seconds. I like to start at the top so any excess condensation drips down to the wallpaper below and begins loosening it up before I even get there.
Move the steamer to a new section of the wall while you scrape off the current section. If you have a stubborn piece of wallpaper, you may need to repeat these steps.
How to Remove Wallpaper with Wallpaper Stripper
The one and only time I used a chemical stripper was the first time I removed wallpaper. In my experience, I’ve found wallpaper stripper to be only semi-effective, and it was a goopy mess. With the amount I needed, it ended up being pretty expensive, too. On top of that, my hands were super sore from spraying it by the end.
If you choose to go this route, here’s what you need to do:
Spray the stripper on the wall
Wait 5-10 minutes
Scrape it off (repeat if needed)
How to Remove Wallpaper with DIY Mixtures
Lastly, there are several more cost-effective wallpaper stripper mixtures you can use, including fabric softener, vinegar, or dish soap mixed with hot water. After I tried the wallpaper stripper in my first house, I finished the task with fabric softener and water.
While this method was effective, the smell… oh man. The smell of fabric softener was STRONG and lingered for quite a while. Regardless, I’m not here to gatekeep. Here’s how you strip wallpaper the DIY way:
- Mix your solution of choice in a spray bottle, garden sprayer, or bucket
- Equal parts fabric softener & hot water,
- Equal parts vinegar & hot water, or
- Tablespoon of dish soap to a bucket of hot water
- Spray your mixture on the wall or apply it with a sponge
- Wait 15-20 minutes
- Scrape (repeat if needed)
Step 5: Remove Wallpaper Adhesive
Once you’ve successfully stripped your wallpaper, you’ll likely have some paste left behind that you’ll need to remove as well. Here’s where a little bit of dish soap and hot water will go a long way.
Simply use a sponge, wipe the walls down, and you’re ready to go!
Final Thoughts
Yes, removing wallpaper can seem daunting, but hopefully, with this tutorial, you’ll feel more confident to tackle this project yourself. Once you’re finished, let me know which method you chose and what you thought!
And if you found this post helpful, please share!


